|
|
Post by kdog on Dec 20, 2010 14:10:36 GMT -7
I have been meaning for a while, to show you guys what I go through, and my thought process when I decide to do a tear down / scratch build project. some may remember the Rat Rod Willy's I did as a give away a couple of years back. 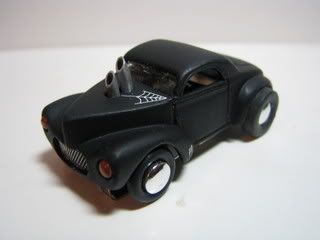 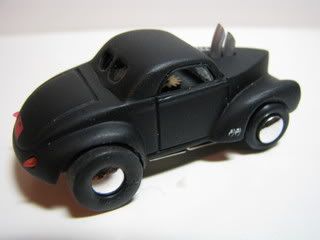 With the chopped top and the hand made aluminum injection pipes, it was a cool build, and I was glad to see it at a recent Nitro event. This time I am building a 56 Ford 4 Gear Door Slammer for the up coming race at Sam's. I will start with a new Auto World 56 Ford 4 Gear body from Auto World. as you can see I have removed all the glass & chrome. I use a Dremil tool with a round grinding bit for this, carefully grind away the melted plastic.....WITHOUT......burning through the body. Don't ask I have been there, an easy touch works here .... 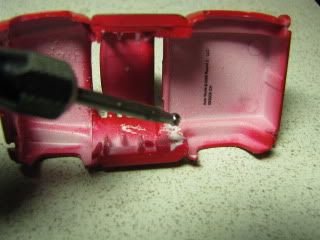 You can see the stock body mounts in this photo that will also be removed. Next the body sitting on a New Old Stock (NOS) 4 Gear chassis. I chose this chassis over the AW one for better tolerances in the gears and the way it will mount for a Slammed look. In the photo the truck is sitting on the tires, so the finished truck will be somewhat higher..... 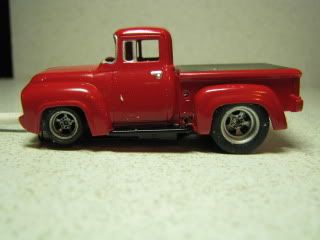 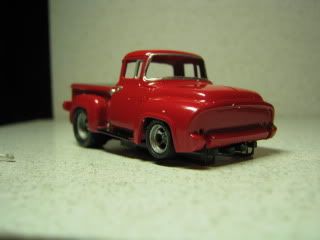 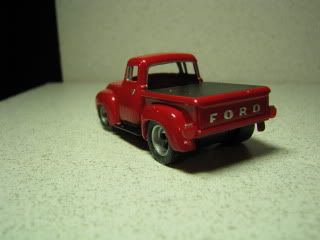 Next my favorite part the Cutting...... As I am off work for Knee rehab I hope to post often till this is finished....Stay tunned DOG |
|
|
|
Post by kdog on Dec 21, 2010 11:12:26 GMT -7
For the next installment I had planed to do the chassis mountings until I realized the front screw post on the Aurora 4 Gear chassis will interfere with the hole I'm making in the hood for the blower, so I'll do that step first. I picked out this blower, and set it on the hood to mark the size hole I want to make.... 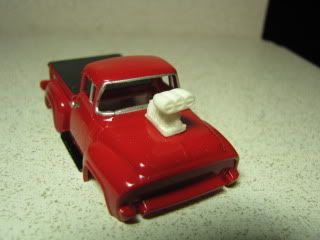 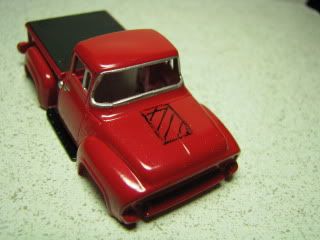 Next I drill a 1/16" hole in all 4 corners, I have used battery drills all my life at work so I am comfortable using them on small work as well, but a simple pin vise hand drill will get the same results. Next i use an exacto keyhole saw to connect the dots, work slowly here. 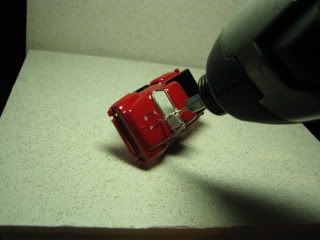 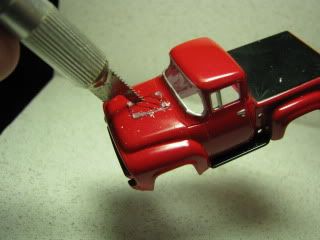 Once the hole is cut I use these narrow sanding sticks I got at the Hobby shop to smooth the rough edges, here are the sticks with the keyhole saw I used.... 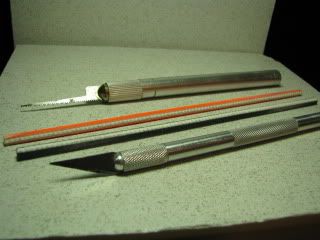 Now you see the finished hole for the blower. I now need to put the backer under the hood to support the blower. 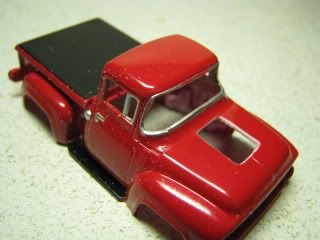 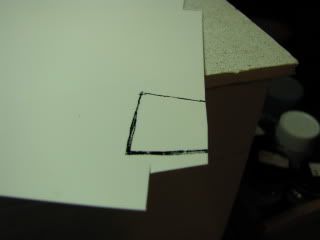 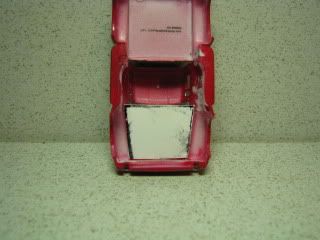 you can see I traced the size of the inside of the hood on sheet plastic, cut it out, trimmed it to fit, and glued it under the hood. I cut it large enough to go fender to fender so it won't be tight under the hood. When the blower is dropped in it will show detail below the hood line very cool. 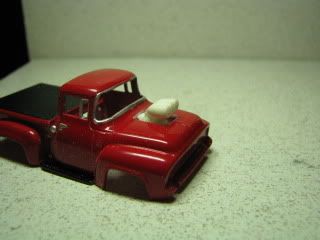 Here is the truck body with the blower trimmed and dropped in place. Next I'll mount the body to the chassis... |
|
|
|
Post by kdog on Dec 22, 2010 7:11:05 GMT -7
Today I am going to get the body mounts built and prep the body for some of the detail parts I will be adding. I start with the rear bracket, I tried a few different pieces of styrene till I found this piece of tubing that provides the correct ride heigth. I first placed it on the chassis and marked each side. I than cut 2 short pieces of plastic and glued them on the marks... 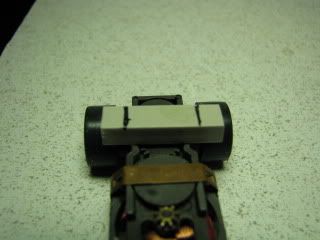 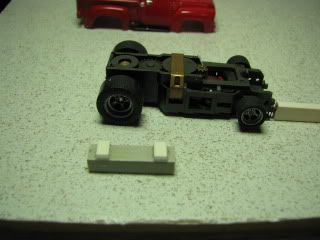 I placed the tubing in the truck bed and glued it in the truck bed. Now is time for the front screw mount. For this I used square styrene cut roughly to length, (a bit long is better). I drill a 1/16 hole in the center, than screw it to the chassis.... 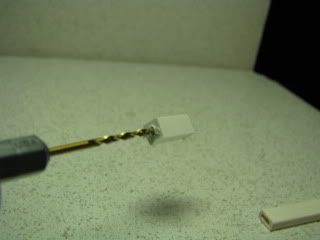 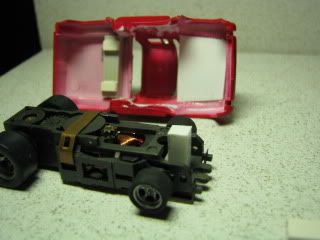 Set the body on the chassis and adjust the front ride height by sanding the post till you have what you want. Put your favorite glue on the screw post and set the body on, being careful to get it centered and level before the glue dries. At this point I should say the Dog likes Gap filling CA (instant glue) the best, buts that's me, 5 Minute Epoxy gives you more time if you are trying this for the first time.... 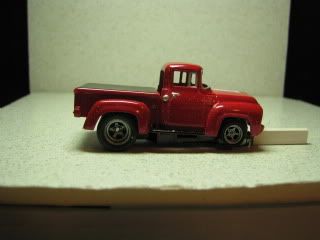 After the glue cures you can unscrew the front post and remove the body. Here you will see the finished mounts. Notice I added another at the rear tail gate area for a future Wheelie Bar... 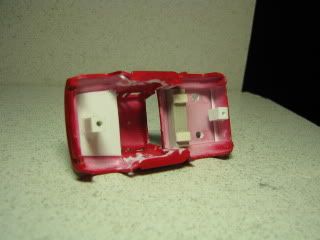 Before the body goes to the paint shop I want to prep it for a few detail parts I will add in final assembly. I want to drill holes for the, exhaust pipes, and the roll bars, than i prep the tail gate for the spoiler... 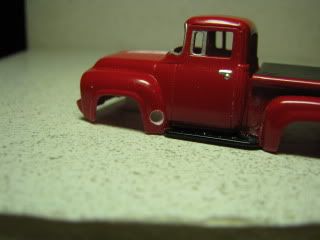 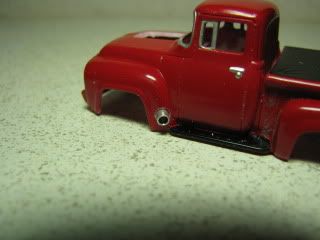 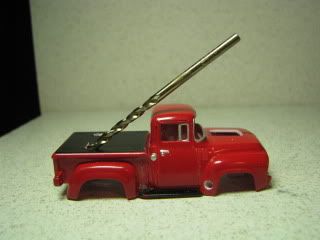 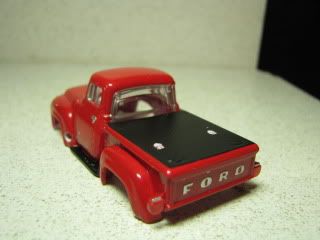 This next step isn't for the faint of heart, one slip of the saw and you start over, so go slow here. I slice the tail gate with a razor saw, once finished I cut another piece of Styrene for the spoiler 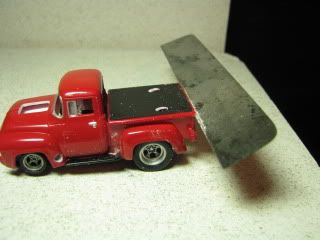 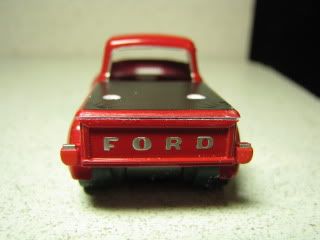 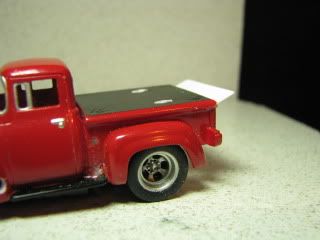 Here is the 56 attached to the chassis ready to go to paint. 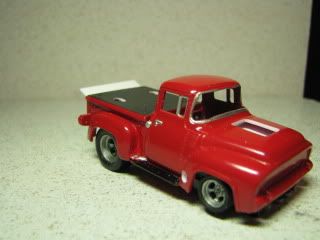 Next up I add the final detail parts to the finished truck ! |
|
|
|
Post by kdog on Dec 30, 2010 9:36:52 GMT -7
After a great Christmas holiday I'm back to work on the Door Slammer 56 Ford pickup..... I didn't really spend any time on the aluminum exhaust pipes or roll bar as all you need to do is cut them to length and glue them in place. The blower was a different story this time, as I wanted to add some linkage, and plumbing detail. 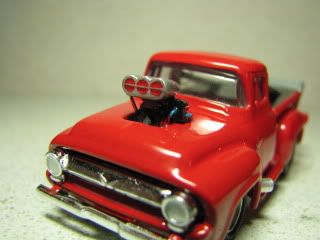 Here is the finished blower... I start by drilling the hole for the linkage on the left side of the blower as you face it. I'm not sure of the size but it was the smallest Brass wire the shop had, than pick a drill bit the same size. 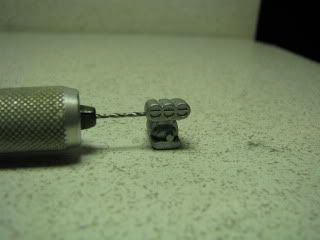 next a hole on the right below the scoop for the collector block... 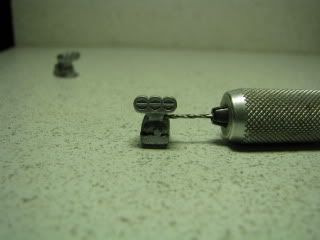 Now I start on the block I drill holes through 3/32 x 3/32 plastic bar, both directions, one slightly higher than the other. Next you need to find room for the last hole for the Brass wire that will attach the block to the blower. 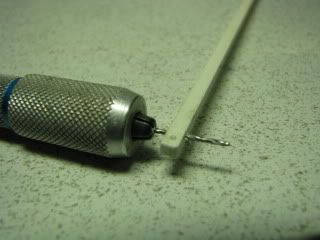 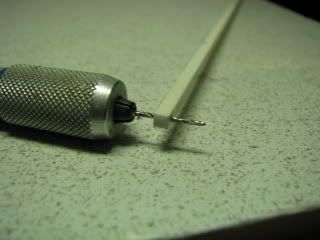 After I spray the block black, I cut a piece of thin blue wire around 3/4" long and glue them in place. You will also see the brass wire bent for the linkage... 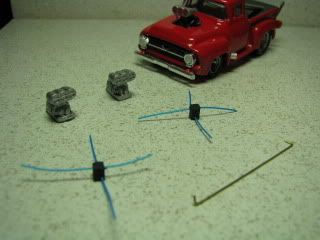 I use blue wire with a red strip painted just leaving a bit of blue showing to look like the blue and red fittings on modern blowers. You will also see the Brass linkage glued in place and trimed... 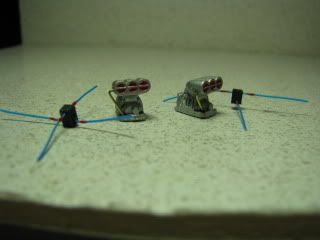 Next I paint the rest of the blue wire silver to look like the bradded section of the hose, and add the brass wire to the block... 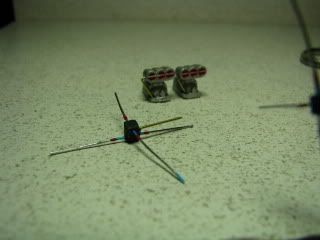 Last just bend the wires to shape and trim / glue the brass wire the the hold below the scoop... 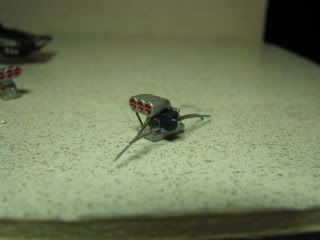 and there you go Blower Detail !!! Now I will say this proved to be fairly easy, I can think of a bunch of ways the Dog could have went into more detail. I'll finish with a quote that took me from an avrage model builder in the 90s, to a contest winner almost everytime out, "treat every piece of your build like a seprate model, and build that piece to win". Anyways..... The last installment to this build will be a custom made Wheelie bar, with a parachute bracket built in. |
|
|
|
Post by kdog on Feb 28, 2011 17:58:07 GMT -7
Ok I know it's been a bit.....but I'm back to finish the 56 Ford Door Slammer Build..... This last installment is a 2fer, I finish the truck, & show how I build a wheelie bar ! First the parts.... 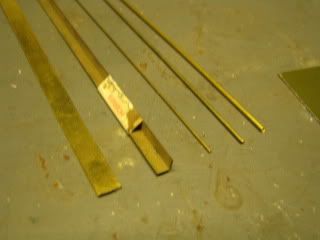 I use 1/16 for the main frame, 1/32 for the axle, 3/32 for the tubeing, 1/4x1/4 for the angle, & 5/16 flat stock. Here they are cut up, and drilled. 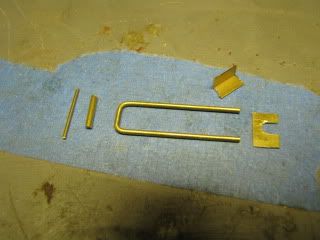 Next a bit of an overview on soldering. I used to be intimated by soldering, than I watched a friend/master do it. I use a steel plate screwed to my work bench as a starting point, next I use sheet magnets to help hold parts in place.... 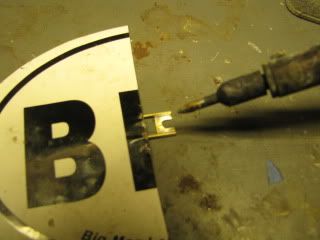 I make sure to have flux on the parts, clean my tip and add a small bit of solder, than just touch it to the joint you are working on, and let it flow. Pratice is the key here if it doesn't work melt it and try once more. 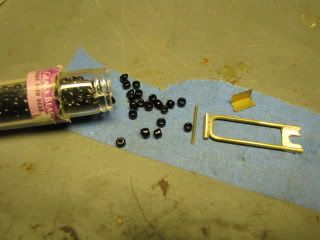 Now the first 3 parts asembled ready for baeds.....Here lies the issue for some guys, walking into a craft store and asking for glass beads.. No Problem the DOG can help here to ! I just scrach my fingernails on an old engine block for the black nail look, than put your best "wife beater" (sorry ladies) tee shirt on your Pit bull for a few laps around the back yard, now you have "the Look". Next open a can of BUD and massage into your scalp..... You can now walk into any Craft Store and not have your manlyness questioned....I Think  Anyways I glue 1 bead to the axle, than the next, and you are almost ready to roll. 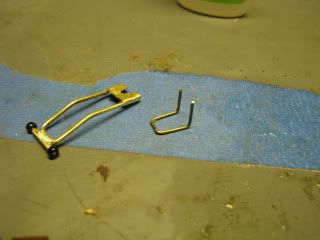 you see I have also made a bracket to hold a parachute, as you can see I tossed the angle bracket for one made of wire, I solder it onto the wheelie bar as well. 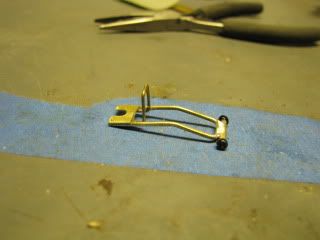 Now....The 56 FORD Door Slammer reveal.......... 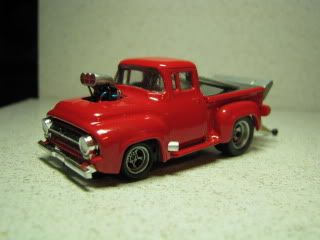 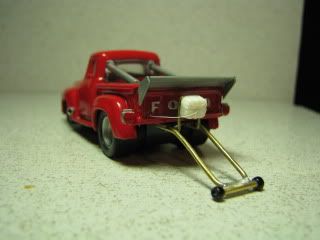 Wow this has been a LONG, but FUN build, I hope everyone enjoyed it as well as I did. Dog |
|
|
|
Post by ninjatek on Mar 2, 2011 6:52:20 GMT -7
Wow. Really cool. How do I win this one??lol The Dog does it well!!! Very nice indeed...Like them side tubes too!!! Thanks for the how to do on the bars...RM Looks great dog. I wish I could make some nice wheelie bars, I haven't mastered soldering yet. Dave Very nice Dog! You took the bar up a few more notches on the blower detail. I'll give this a try the next time I detail one. I also like your advice on treating each piece like a separate model, good stuff  A great reference! A tutorial to be saved. -ninjatek  Get a copy of the 'KDog Door Slammer' tutorial here: www.ninjatekprojects.com/PDF/KDOGsDOORSLAMMER.pdf |
|
|
|
Post by nosubfor3 on Jan 30, 2019 4:00:47 GMT -7
Today I am going to get the body mounts built and prep the body for some of the detail parts I will be adding. I start with the rear bracket, I tried a few different pieces of styrene till I found this piece of tubing that provides the correct ride heigth. I first placed it on the chassis and marked each side. I than cut 2 short pieces of plastic and glued them on the marks...   I placed the tubing in the truck bed and glued it in the truck bed. Now is time for the front screw mount. For this I used square styrene cut roughly to length, (a bit long is better). I drill a 1/16 hole in the center, than screw it to the chassis....   Set the body on the chassis and adjust the front ride height by sanding the post till you have what you want. Put your favorite glue on the screw post and set the body on, being careful to get it centered and level before the glue dries. At this point I should say the Dog likes Gap filling CA (instant glue) the best, buts that's me, 5 Minute Epoxy gives you more time if you are trying this for the first time....  Hey Dog what are you using for exhaust pipe ? After the glue cures you can unscrew the front post and remove the body. Here you will see the finished mounts. Notice I added another at the rear tail gate area for a future Wheelie Bar...  Before the body goes to the paint shop I want to prep it for a few detail parts I will add in final assembly. I want to drill holes for the, exhaust pipes, and the roll bars, than i prep the tail gate for the spoiler...     This next step isn't for the faint of heart, one slip of the saw and you start over, so go slow here. I slice the tail gate with a razor saw, once finished I cut another piece of Styrene for the spoiler    Here is the 56 attached to the chassis ready to go to paint.  Next up I add the final detail parts to the finished truck ! |
|
|
|
Post by nosubfor3 on Jan 31, 2019 4:03:27 GMT -7
Hey Dog what are you using for exhaust pipe ?
|
|
|
|
Post by kdog on Jan 31, 2019 10:41:52 GMT -7
I believe that was 3/32 aluminum tubing
|
|
|
|
Post by AJR on Jan 31, 2019 15:07:47 GMT -7
I haven't seen this build in a loooong time. Kevin this post of the Ford truck mods was what inspired me to start building customs. I joined in 2011 and had only built models before this and raced my slot cars when I was teen. I had not ever thought about making these kinds of modifications on an HO body before that. I've been hooked ever since! So I blame you for this addiction to customs that I have.....LOL. There are others I can blame......just thought I would share that. It's a great article. Thanks.
|
|
|
|
Post by kdog on Jan 31, 2019 15:21:30 GMT -7
I haven't seen this build in a loooong time. Kevin this post of the Ford truck mods was what inspired me to start building customs. I joined in 2011 and had only built models before this and raced my slot cars when I was teen. I had not ever thought about making these kinds of modifications on an HO body before that. I've been hooked ever since! So I blame you for this addiction to customs that I have.....LOL. There are others I can blame......just thought I would share that. It's a great article. Thanks. While i am sorry I got you addicted really I am not, the resins you are doing are sweet, and your paint work equally nice so Thanks and Thank you for the cool Pickups... |
|