|
|
Post by Eagle Racing on Oct 15, 2018 13:43:00 GMT -7
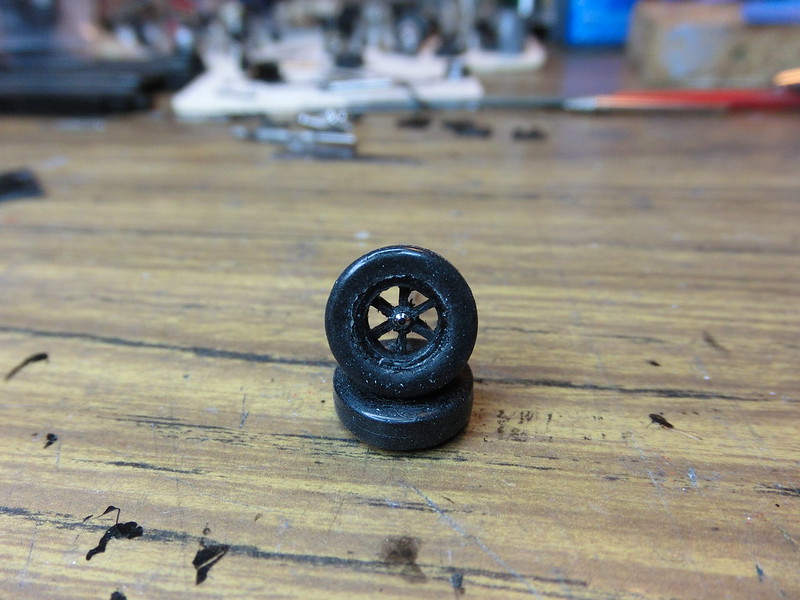
Here is a pic of my 3D printed ABS plastic 6 spoke wheel. On the bottom is the wheel with a Jel Claw hot rod/dune buggy tire. The top one is the same wheel with one of my custom .550 dia. silly foam tires. This narrow wheel works great when tucking the tires inside my resin bodies that I cast.
|
|
|
|
Post by jbailey on Oct 15, 2018 19:46:31 GMT -7
Nice! What kind/brand of printer are you using and what size nozzle? I have my printer, or I should say had my printer dialed in pretty well but, don't think i could get that kind of result especially with abs.
|
|
|
|
Post by Eagle Racing on Oct 16, 2018 4:16:49 GMT -7
Nice! What kind/brand of printer are you using and what size nozzle? I have my printer, or I should say had my printer dialed in pretty well but, don't think i could get that kind of result especially with abs. Thank you, those were done with my XYZ Pro Series Printer, .4mm nozzle. For making models that I cast in metal I have a resin printer. The detail is amazing with it. |
|
|
|
Post by sandfly on Oct 16, 2018 11:15:12 GMT -7
Just a word from us NZers, we have ordered some stuff from eagle racing, must say am very impressed with the communication and speed that the items have been made, now just waiting for the goodies to be shipped and to arrive. Big ups to you Robert Shell. Seems im always waiting, cant wait need new stuff to play with.
|
|
|
|
Post by Eagle Racing on Oct 17, 2018 7:13:35 GMT -7
Thank You NZers!!!
|
|
|
|
Post by cozee on Oct 17, 2018 8:49:40 GMT -7
How does one place an order? I am wanting to get a CF car and a couple bodies.
|
|
|
|
Post by Eagle Racing on Oct 17, 2018 12:40:04 GMT -7
Go to eagleracing.us and select what you want. Then click the contact us button. That is my email eagleracing@verizon.net
Once you send me the order I will respond and confirm the order with total amount and payment instructions.
|
|
|
|
Post by Eagle Racing on Nov 1, 2018 15:15:53 GMT -7
I have been checking out different factory gears. The motor in the carbon fiber chassis has a factory Life Like 7T pinion on it. I make an 8T resin pinion but, they don't last as long. So I have a (How To) for 8T factory pinion to fit the 1mm shaft on the motor. For crown gear replacements I make a 20T and a 22T resin but, they won't last like the factory gears. So I have found the DR-1 25T crown fits with no mods. For gears that the back shoulder can be sanded down to fit: Super G+ 25T and the Tomy Turbo 22T work nicely. Then you get into factory modified custom gears that can be done on any gear. I will share all of the How To's here and on my web site.
|
|
|
|
Post by sandfly on Nov 1, 2018 17:03:03 GMT -7
So a quick thanks to EAGLE RACING for a top notch purchase for us lads in New Zealand, package arrived well wrapped, no damage, cars look fun to assemble, will play with mine over the week end no doubt, once again excellent service and communication, spot on.
|
|
|
|
Post by Eagle Racing on Nov 9, 2018 8:16:12 GMT -7
Thought I would do a how to for mounting Eagle resin bodies on the Eagle Carbon Fiber Chassis. This should also work for other resin bodies.
Here are some pics of a Falcon I am working on. The chassis has the 3D printed 6 spoke wheels on the rear. It shows the body mounts installed before I glue them in. On the Falcon the fronts will end up being even with fenders an just a little space above tire to keep from rubbing. This is done by using just a little larger front wheel when gluing mounts in. On the rears I make a lift from styrene that is just a little taller than the tires. This helps keep them from rubbing. I then mix up some 5 minute epoxy and apply to mount and set the body on straight.
After mounts have been glued in and the epoxy has set, check the tire fit. If they are rubbing the body you will now need to use your Dremel to adjust the fit. On the rear you will use the round diamond ball bit to remove resin from the body where the tires touch. On the front tires on the Falcon you will use the Dremel round barrel bit for this. Once everything is like you want you are done. 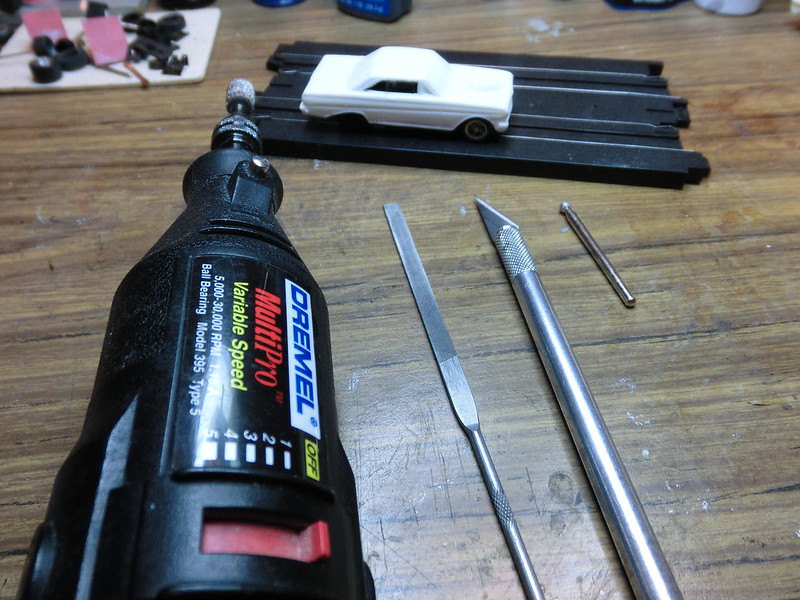 Tools you may need. Tools you may need.
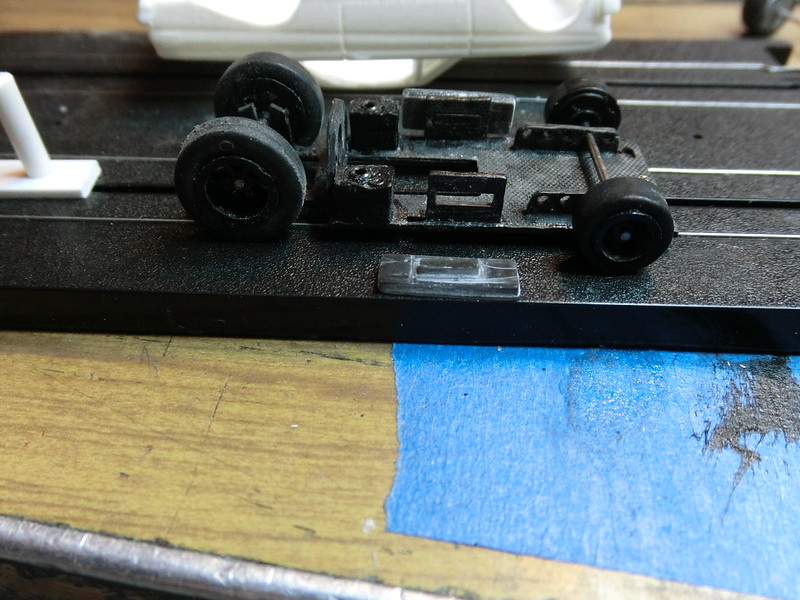 Here are the body mounts, check the fit. If the mount needs material removed use a small flat file to adjust. Here are the body mounts, check the fit. If the mount needs material removed use a small flat file to adjust.
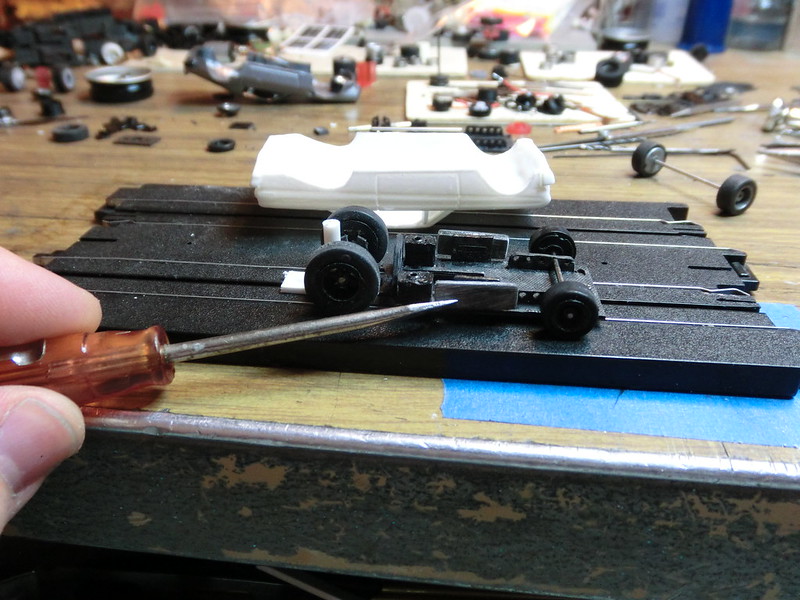 Here the body mount fits into the chassis mount. Here the body mount fits into the chassis mount.
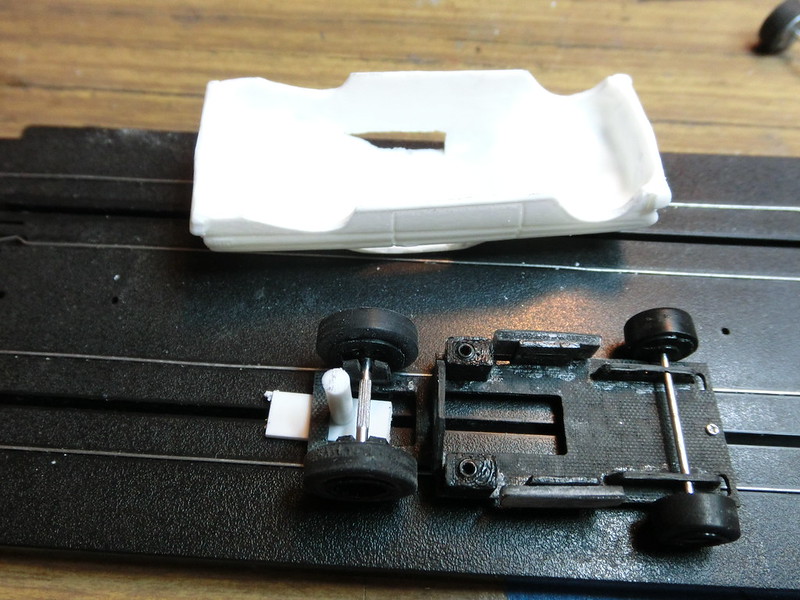 Here you can see the styrene lift I made and the body mounts from above. Here you can see the styrene lift I made and the body mounts from above.
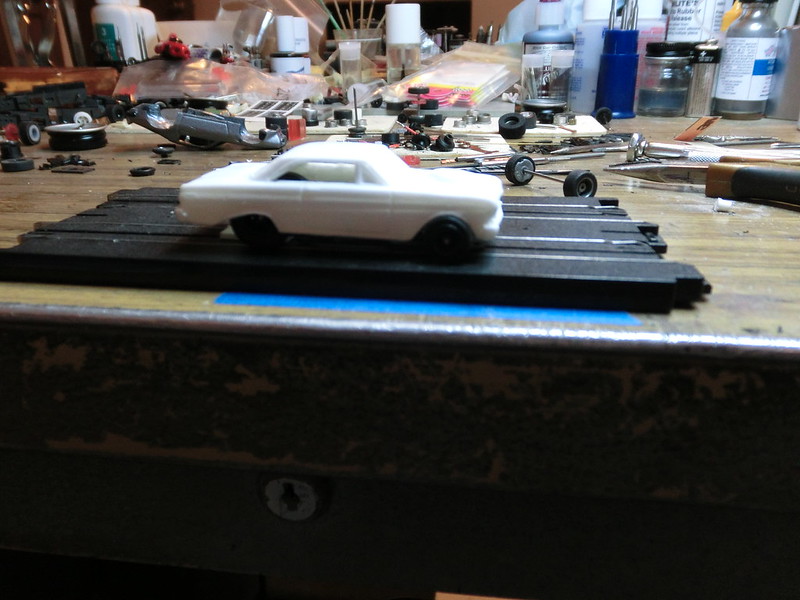 Here is the body mounts have been installed and epoxy applied to outside of body mount ONLY. Here is the body mounts have been installed and epoxy applied to outside of body mount ONLY. 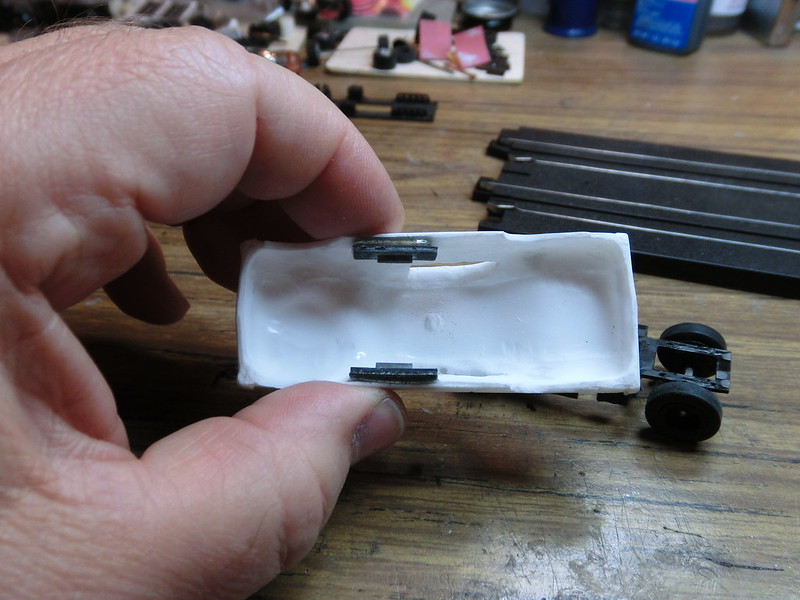
Here you can see the body mounts glued into the body with the epoxy.
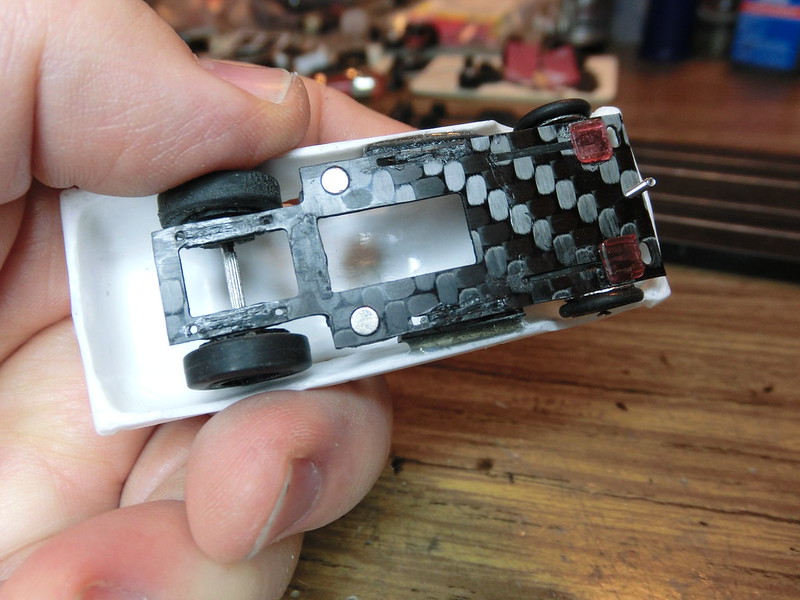 Here you can see the chassis snapped into the body after the mounts have been installed. Here you can see the chassis snapped into the body after the mounts have been installed.
|
|
|
|
Post by GTS on Nov 9, 2018 9:13:19 GMT -7
Very Cool! Thanks for sharing!!!
|
|
|
|
Post by AJR on Nov 9, 2018 14:39:35 GMT -7
Nice tutorial Robert!
|
|
|
|
Post by hairycanary on Nov 10, 2018 14:27:42 GMT -7
Robert good timing on your tutorial. I got my two Eagle chassis and body's Thursday. They are Awesome. I couldn't wait to try them so I threw some wheels and tires on adjusted the traction magnets to where they felt good. at 20 volts and no other adjustments the best out of 10 runs was.502 at 28 MPH. The MPH shows its making horsepower. Track Timing was at 1000 scale feet. Without a body. Not to bad for doing nothing. Hopefully I can tune it better and not worse ? Looking forward to some tuning. Thinking about mounting my Head Hunter Camaro on one ? Its just been sitting waiting for some action. Thank You Robert Very Nice work. 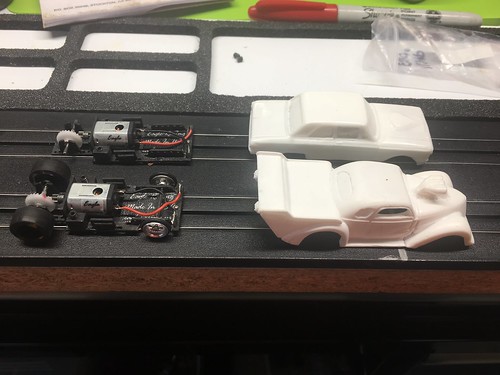 Untitled Untitled by rick williamson, on Flickr 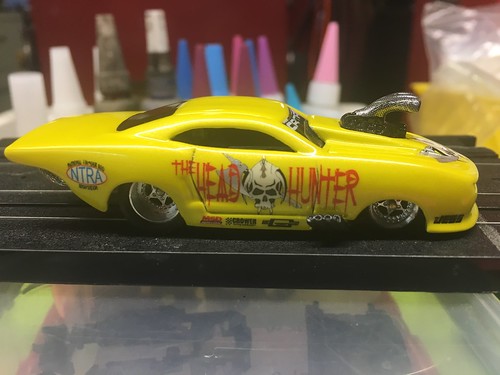 Untitled Untitled by rick williamson, on Flickr |
|
|
|
Post by Eagle Racing on Nov 19, 2018 16:09:50 GMT -7
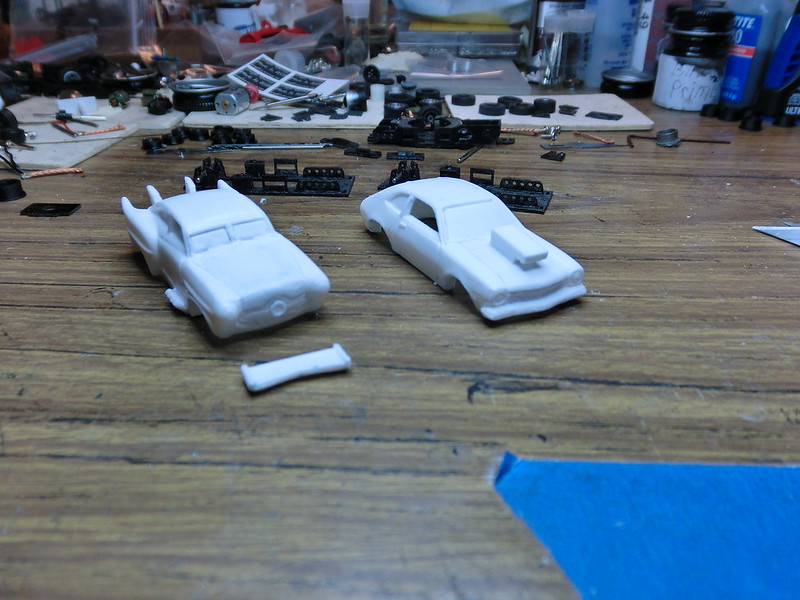
Took a little time to do some casting over the weekend. Here are a couple refreshed bodies I have been doing for several years, Henry J and a Pro Stock Pinto.
 |
|
|
|
Post by Eagle Racing on Dec 17, 2018 5:56:46 GMT -7
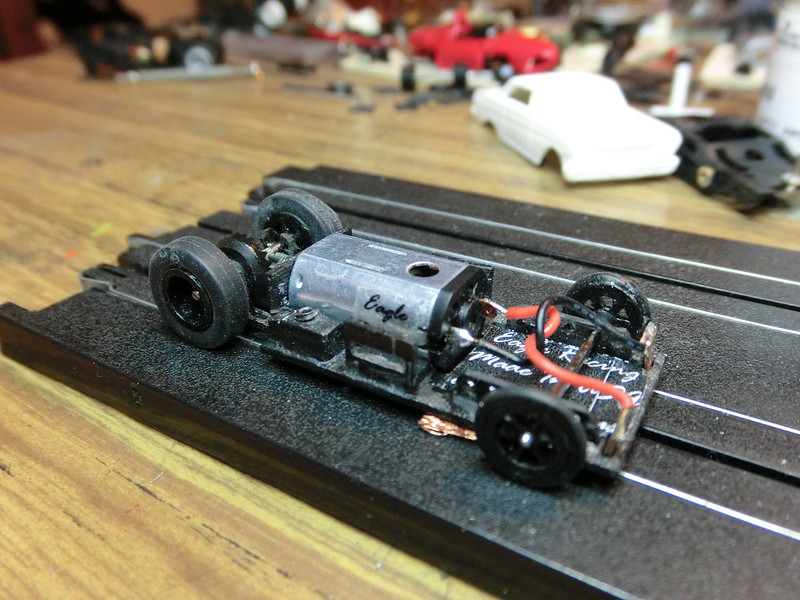
Still working on the Falcon project. I have modified the chassis so that it will now except the N20 or N30 motor. Here is the chassis with an N30 motor. It is a 6 ohm factory motor. I will be posting some ETs soon. With this chassis I will be running a 7T pinion and a 22T crown gear. The crown gear is a Tomy Turbo gear. To make it fit just sand down the back collar. I also added a bit of styrene behind the body mounts on the chassis to stiffen them up. I glued a flat piece the width of the mount to the chassis. Here are a few pictures.
 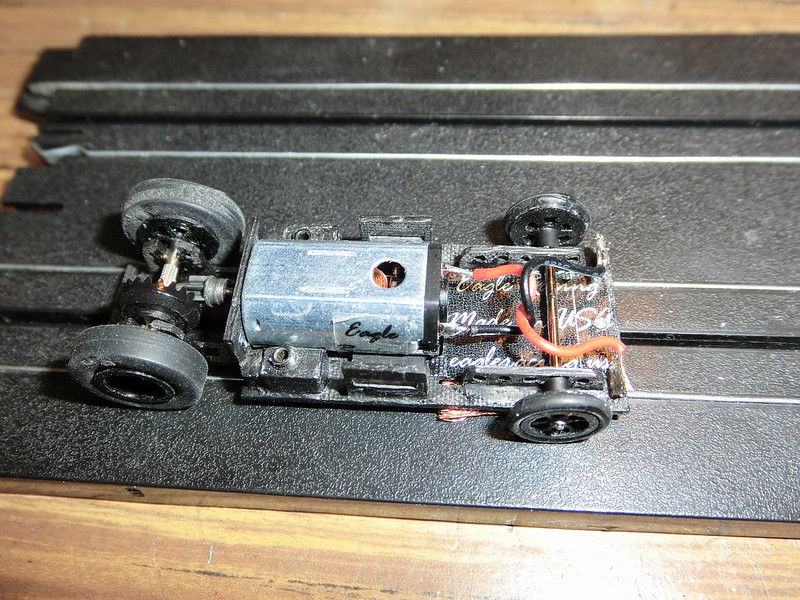 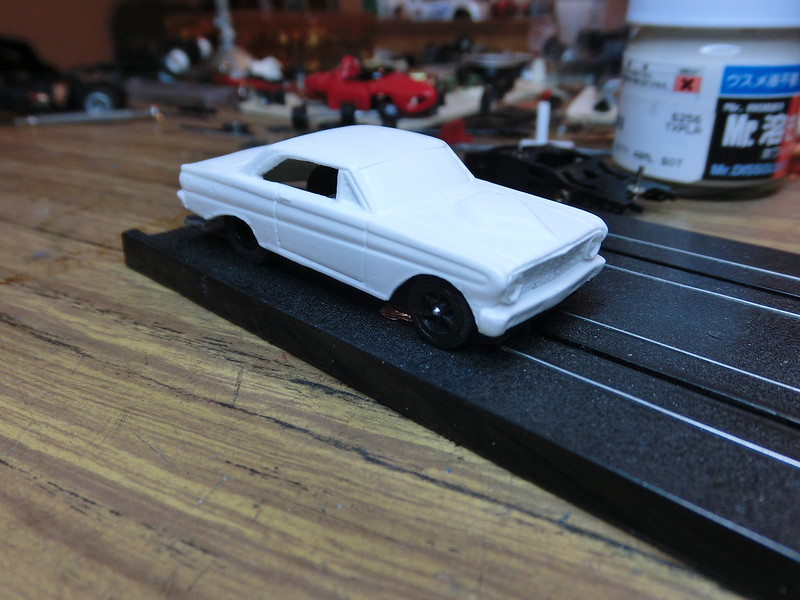
|
|