Basic Armature Balancing
Aug 10, 2022 17:21:58 GMT -7
hairycanary, pennywize619, and 3 more like this
Post by AJR on Aug 10, 2022 17:21:58 GMT -7
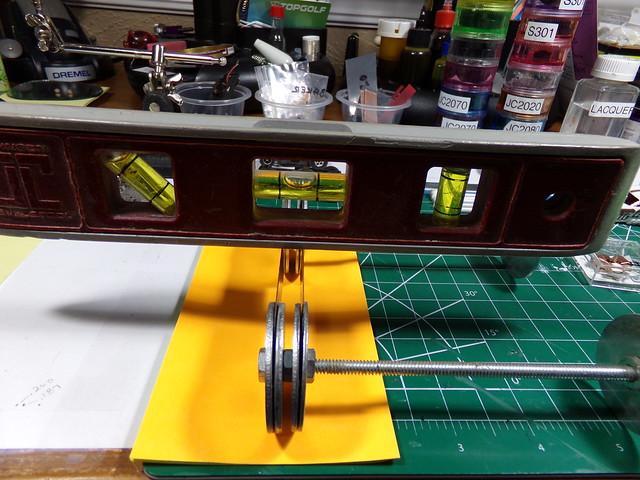
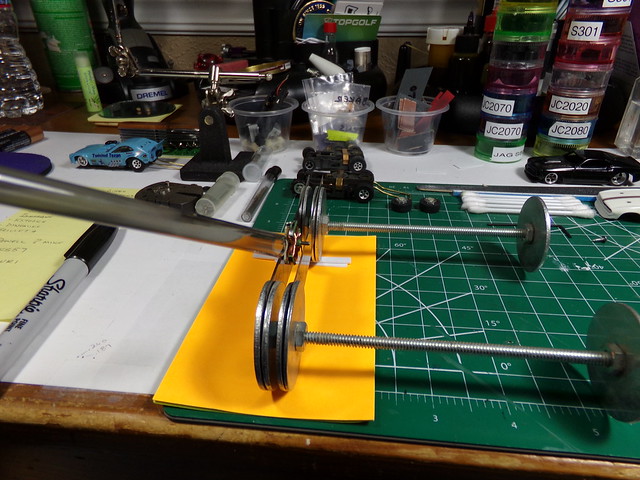
This is how I go about checking armature balance and balancing an armature. I read this tip somewhere and copied the idea. I am sure there are other and better ways of doing this, but this has worked well for me for many years. The components for this are (2) 4" breakaway utility knife blades (4" scraper blade would work well), (2) 3/16 x 4" machine screws, (10) nuts to fit the screws, (10) 1 1/2" flat washers and a drinking straw or something similar to blow air through. Everything is assembled as in the pictures to create a low drag channel for the armature shaft to roll on. The blades are pinched between 4 of the washers and are set the same on each side. The channel is 5/16" wide and blades are used to have a minimum drag on the shaft as it rolls. That seems to be a good working width. Too wide and the arm falls between the blades...not wide enough and the arm hits the sides.


I mark each armature lam. One I leave blank, one with one dot, and one with two. This will allow me to identify heavy and light sides.


I use a torpedo level to level the blades both sideways and long ways. I will add shimming to obtain level.


I then place the armature on the channel as shown and use the straw to gently blow on it to make it roll back and forth in the channel. Gently is the key. You want it to roll just enough so that it will stop before the end of the channel. The heavy side will be down. I will do this several times to identify the heavy side. I will then add epoxy to the opposite side to offset the heavy side. I use 30 minute epoxy and only add a small amount at a time. It is easy to apply, but hard to remove. I continue this process until the armature stops randomly and shows no distinct heavy side. Shown is an Eagle Racing armature that has been balanced using epoxy. You can see the epoxy between the comm and the windings. This takes patience and repetition. Click on the pictures and they can be enlarged in Flikr for a better view. For Classes that do not allow balancing, this tool can be used to find the best balanced stock armature. Smoothness and balance = power. Hope this helps someone.


I mark each armature lam. One I leave blank, one with one dot, and one with two. This will allow me to identify heavy and light sides.


I use a torpedo level to level the blades both sideways and long ways. I will add shimming to obtain level.


I then place the armature on the channel as shown and use the straw to gently blow on it to make it roll back and forth in the channel. Gently is the key. You want it to roll just enough so that it will stop before the end of the channel. The heavy side will be down. I will do this several times to identify the heavy side. I will then add epoxy to the opposite side to offset the heavy side. I use 30 minute epoxy and only add a small amount at a time. It is easy to apply, but hard to remove. I continue this process until the armature stops randomly and shows no distinct heavy side. Shown is an Eagle Racing armature that has been balanced using epoxy. You can see the epoxy between the comm and the windings. This takes patience and repetition. Click on the pictures and they can be enlarged in Flikr for a better view. For Classes that do not allow balancing, this tool can be used to find the best balanced stock armature. Smoothness and balance = power. Hope this helps someone.


