|
|
Post by SKR on Apr 13, 2007 19:32:18 GMT -7
Here is how I make wheelie bars for my Thunder Jets. If your thinking about running the Psycho Jets class, these are a must. This might not be the best or easiest way, but it works for me. I'm using pink beads on this one for Chima as she likes everything pink. Beads come in all colors. Thanks Killer for some of the tips I'm using. Supplies used - .033 Piano wire. Hobby shop - .025 Brass plate. Hobby shop - Treasures glass beads. Hobby Lobby - E Goo/ Shoe Goo. Hobby Lobby - Acid Flux. Lucky Bob's Part #1200 - 60/40 Rosin core Solder. Radio Shack Tools - Needle nose pliers - Soldering Iron - Dremel with cut off tool - 800 Grit wet/dry sanding paper - Marker 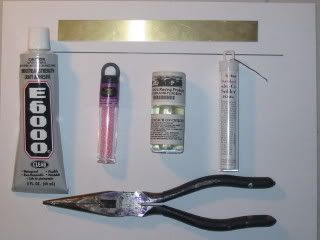 1) Take your brass plate and measure the width of the rear of your chassis. With a marker I make some cut lines. 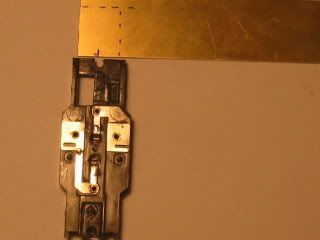 2) After I cut out the plate with my Dremel, there will be sharp edges. I take some 800 grit sand paper and lay the plate down flat and rub in a figure eight motion to knock the sharp shards of metal down. 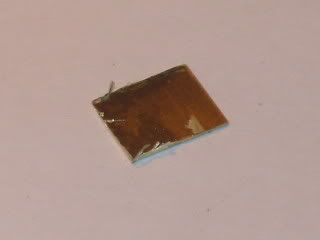 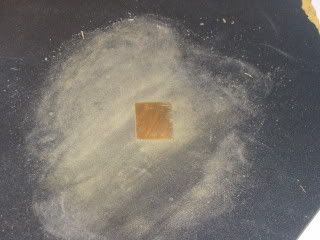 3) Take your piano wire and needle nose pliers and make a bend almost 90 deg. After your first bend slide your needle nose over about 1/4 inch and make your second bend. 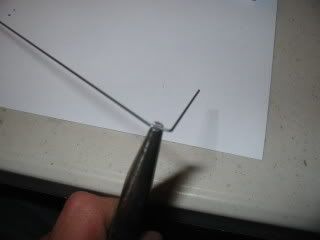 4) I'll dry fit my wheelie bars now. You might have to make some adjustments to your piano wire now. I cut another small piece of piano wire for the wheels as shown. 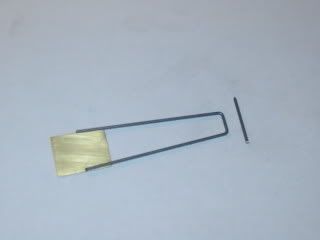 5) Take your flux and brush a little on the plate and piano wire where you'll be making your solder weld. When your soldering iron is hot, melt a little bit of solder to the tip. Place your iron where you have laid down the flux and the solder will transfer to it. Here is a pic after the soldering is done. 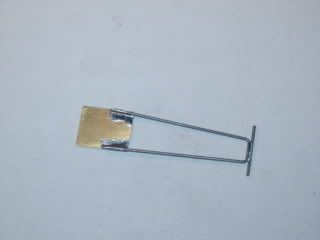 6) Now we will place the plate on the rear of the chassis and mark where our screw slot will be. Take your Dremel and cut along line. Make sure your slot is wide enough for the body screw. 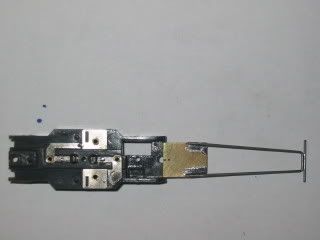 7) Picture after the slot was cut and a dry fit with the screw. 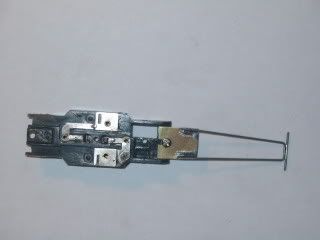 8) Next I bend the plate slightly with needle nose after I had made another mark where my screw slot ends. 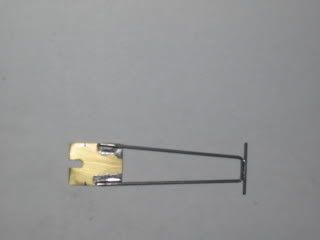 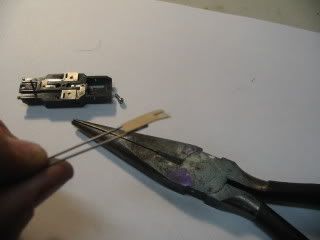 9) I put some shoe goo where I mounted the wheels. I do this for easy replacement of the wheels if a glass bead should break. Trim off the excess piano wire. 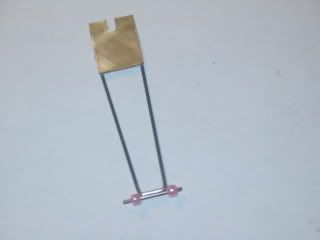 10) Done! You will have to adjust the bars to suit your needs. The brass makes it easy to adjust by bending with your fingers. 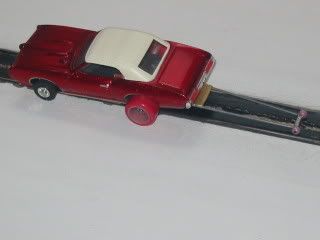 |
|
|
|
Post by johnbalich on Dec 4, 2007 14:24:07 GMT -7
do you put the shoe goo on the axles, out board of the wheels? In other words a lump of goo (how's that for tech terms) acting as a retainer to the bead wheels? I like this form of wheelie bar much better than the gargantuan set ups i have seen. It is much more suggestive of the real thing.
|
|
|
|
Post by SKR on May 13, 2009 5:31:48 GMT -7
Bump
|
|
|
|
Post by kdog on May 14, 2009 14:01:05 GMT -7
With some changes to the Gasser Wheelie Bars, I spent some time in the DOG PIT to try to build a Wheelie Bar for those whom are solder challanged.....What you need! 1 - 3" piece of 3/64" Brass Rod 2 - 1/4" pieces of 1/16" Brass tubing 1 - 1/8" piece of the same tubing 1 - Piece of 1/16" thick sheet plastic, 1/4" wide & 1/2" long 1 - packet of 10/0 Black glass beads * * 2 things these are not very uniform in size so you will have to match 2 up. Second these beads don't want to be Jewelry, nor do they want to be Wheelie Bars....What they want is to be Free Range Beads, so when you match a set, put them in something so they can't get away ! TOOLS I use a pair of square nosed pliers about 1/4" across the nose, like the ones shown, also some pointy needle nose pliers are helpful A hobby saw a small countersink A Dermal w/ a cut off wheel A small round file Some super glue. 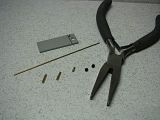 Once you have cut all the pieces, sand the edges and debur the openings of the tubing. I have found when working with small tubing sticking the end on a sharp toothpick helps hold it while sanding. Next step...put the rod in the square pliers with an equal amount sticking out both sides. Than bend one leg only! Slide one of the 1/4" long tubes down the leg you just bent, and super glue in place. Stick the other end of the rod in the bead container and spear one of those little Devils. Than slid the 1/8" tube next to it (no glue here). 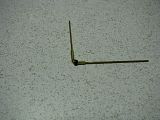 This is where I messed up a couple of sets before I got it right, Slip on the last bead, than leave a little slack before making the last bend. the slack will be taken up by the last 1/4" long tube. This bend is harder to make and the needle nose pliers come in handy here, it won't be as crisp a 90 as the first bend but get it as tight as you can. finally slide the last 1/4" tube and glue in place. 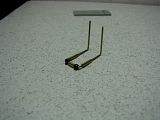 Now it's time to drill two holes in the chassis, I used a 1/16" bit I went even with the back of the rear screw slot, and went 3/16" each way or 3/8" total. Now you decide how long you want them. I held them under the chassis and measured 7/8" from the axle center to the end of the bar, than put a mark at the holes I drilled. I took the square nose pliers and made a 90 degree bend there. 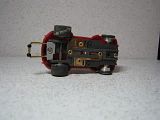 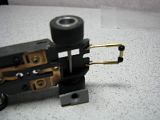 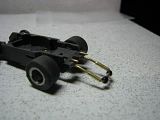 You will notice a small notch out of the plastic 1/4" by 1/2" bar that is for Crown gear clearance, done simply with a sanding stick. You insert the bent legs into the 2 holes and trim. The photo showers the top end of the legs bent over, but I found out later this is not necessary. The other thing I did was to countersink the screw a bit into the plastic retainer so the standard screw would still work. than screw on the plastic retainer, and bend the Wheelie Bar into position. 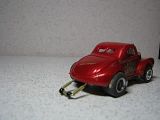 And the finished product, as fate would have it on the Asphalt Elephant Willy's shown on the front page of the site this week. I have installed this same type of bar on my Pro Mod T Jet with no problems, Just imagine those Free Range Beads horror when they go blazing down the Drag Strip at 20 something MPH. ;D HEY you never know they may get JUICED and want to do it again ! |
|
Deleted
Deleted Member
Posts: 0
|
Post by Deleted on May 14, 2009 18:16:58 GMT -7
Sweet set ups guys . I have a set of the ones Sam shows , I will have to try The Dogs
|
|
|
|
Post by SKR on Jul 16, 2009 15:50:31 GMT -7
Here is a set that Demon made up. Very light and a simple design. It's one of those times when you say to yourself "self, how come I didn't think of that" . Demon made a note saying to make sure the front of the bar does not hit the gear or axle when you make them. These are .025" wide. Thanks for sending me a set Demon. I look forward to trying them out. 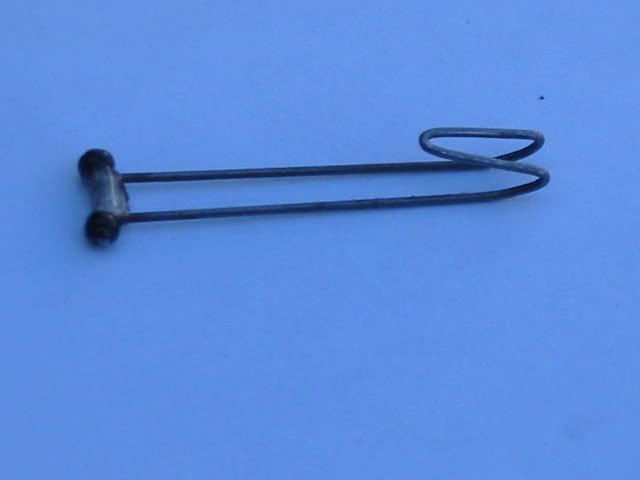 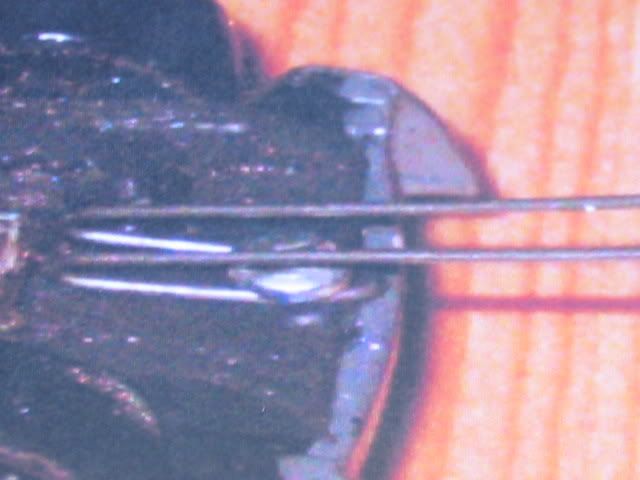 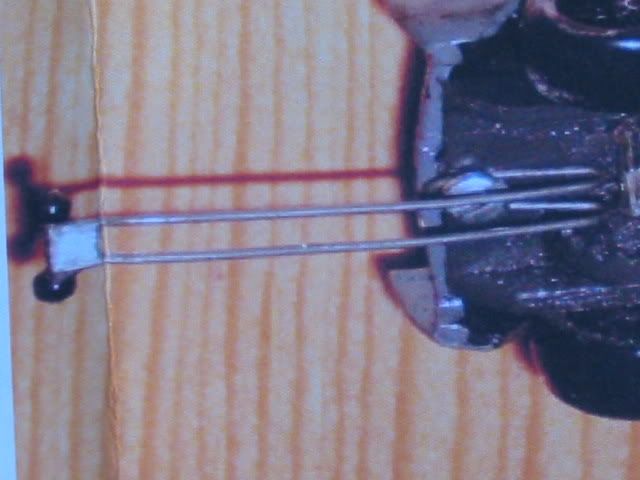 A couple of Demon's pets. Ddog and Cdog.   |
|
|
|
Post by sst1610 on Feb 24, 2011 12:53:57 GMT -7
I feel mildly stupid, I consider myself handy but am I the only one who can't build these?
Dave
|
|
|
|
Post by Bananasmoothie1975 on May 31, 2011 19:52:33 GMT -7
|
|
|
|
Post by TGM2054 on Jun 1, 2011 14:55:41 GMT -7
This one isn"t really free. Instead of using glass beads I found come plastic ones in my tackle box from slip bobbers. They're not as fragile as the glass ones and I think they are more round and consistent is size. Check your local bait shop and they might have them or get them from Bass Pro...... And yes just as the glass ones do, these like to free range also. ;D
|
|
gonzo
Super Stock

Posts: 17 
|
Post by gonzo on Dec 19, 2019 21:40:07 GMT -7
All of the pictures are not coming up . Perhaps the post is too old .
Gonzo
|
|
|
|
Post by AJR on Dec 20, 2019 6:02:07 GMT -7
All of the pictures are not coming up . Perhaps the post is too old . Gonzo The owner of the pictures has either closed the account or moved the pictures from where they were posted from. That is why they are not showing up. You will also see on the older pictures posted from Photobucket that they are blurred out. That is a consequence of Photobucket holding the pictures hostage for money. Most people did not pay the ridiculous amount they wanted and that is the result. FYI.... |
|
|
|
Post by ecbill on Dec 20, 2019 6:08:41 GMT -7
All of the pictures are not coming up . Perhaps the post is too old . Gonzo If you want to take the easy way, Road Race Replicas sells functional bolt on wheelie bar. Jag Hobbies, one of our race sponsors sells them. They look good too. |
|
|
|
Post by AJR on Dec 20, 2019 17:02:55 GMT -7
Here is an example of the Tjet wheelie bars that I make for my cars. I do not use wheels on mine. these are the simplest version of a wheelie bar. Some .018 brass plate, .047 brass bar, and basic soldering skills. The brass rod is rigid enough to hold it's shape but can still be bent to adjust.


|
|
|
|
Post by dave632 on Dec 21, 2019 18:57:40 GMT -7
Photobucket did everyone dirty. I have paid to join Flikr as they did not do what rotten bucket did. I simply bend my wheelie bars into a V shape then drill holes in the chassis to install the bar and it works fine. .032 brass rod and .07mm drill for a press fit. Takes me about 5 minutes to do and I have at least 100 cars with them installed that way.
|
|
Deleted
Deleted Member
Posts: 0
|
Post by Deleted on Dec 21, 2019 19:19:43 GMT -7
cheapo ... used t-jet pick up shoes.
use the front window to fit the rear screw and bend to fit.
may need to be adjusted each round, but works pretty darn good.
|
|


