Post by slotcar64 on Jan 20, 2009 9:57:27 GMT -7
For part 1, I’m gonna throw back some 40 years to Auto World’s original article on getting a ThunderJet to pull Wheelies.
Per their article, you basically wrapped the pickup shoes and guide pin in electrical tape.
Also late in the ‘60s (again, I think Auto World) was a ‘wheelie kit’ for thunderJets. The following is basically the same thing as the wheelie kit you use to be able to get - with a small upgrade.
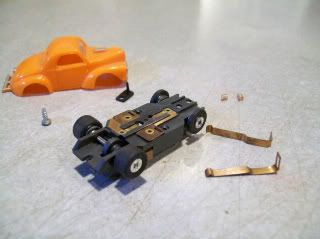
Start by taking the pickup area apart…
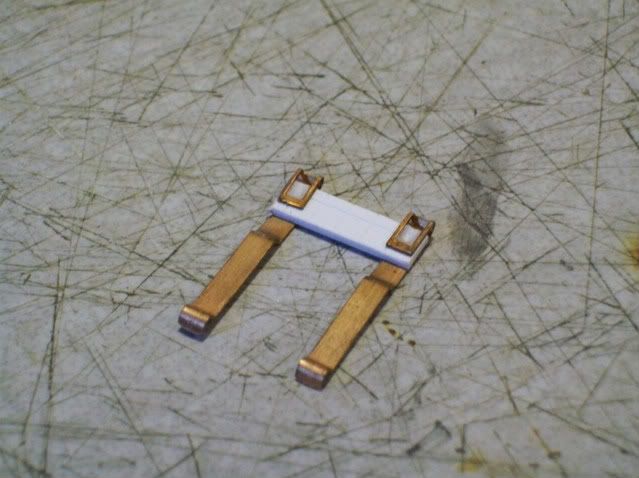
Using a piece of .015 styrene, Bend the front of each shoe over the styrene as shown, fit to chassis making sure of the proper alignment (e.g.- rail contact distance between shoes). Add a drop of Super glue to hold things in place.
Using the .015 styrene is my upgrade… the Wheelie kit you use to be able to get was too thick and often wouldn’t let both shoes touch the rail without much tweaking. Using the thin styrene lets the whole unit flex more easily for more even shoe contact.
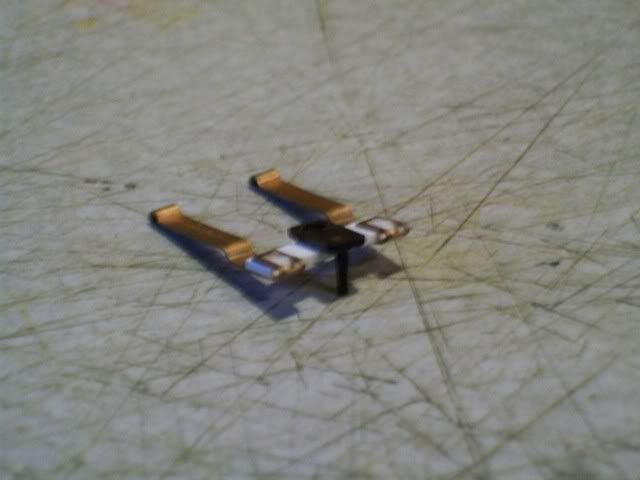
Super glue the guide pin in place as shown
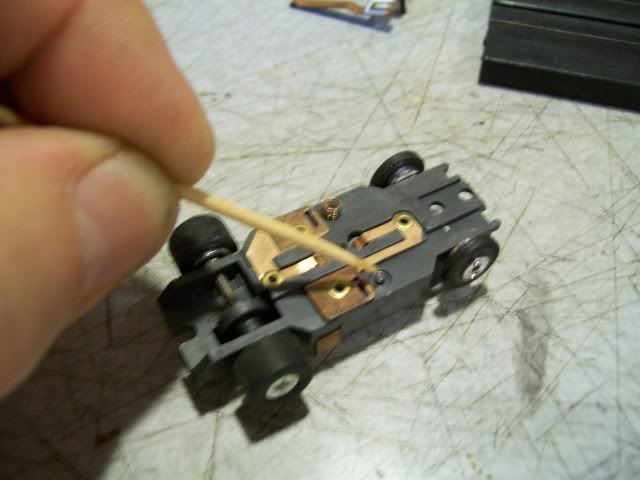
Using a toothpick, put a small drop of Super glue in the spring mounting hole of the chassis – DROP the spring in place (if you push or put any pressure on the spring, the glue will get into the coils)
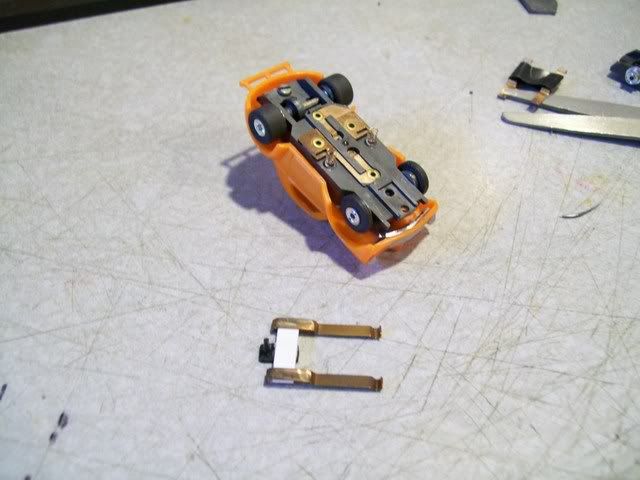
Trial fit the new pickup system on the chassis. You may need to bend the shoe (holding hook) or bend up the plate a bit to get the shoe system to move freely. Things should be pretty loose.
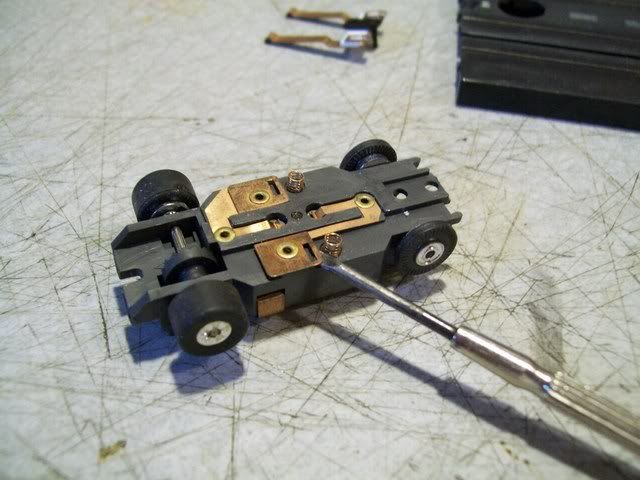
Now time to stretch out the springs. DON’T stretch the spring a lot all at once, just a little each time between test runs (adjustments)..
You will need to add weight and adjust / stretch the spring tension as needed to get the results want.
SHUNT wires would also be a good idea (better contact, spring control, and will keep the shoe assembly ON the chassis)
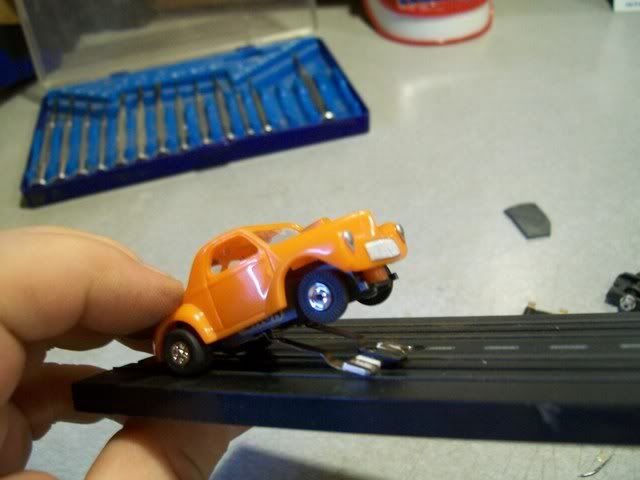
Now, while this is a ‘real’ Wheelie system and does work, I will state here this is NOT my favorite wheelie system. It is not very reliable and will take a lot of tweaking to get the results you’re looking for. More often than not, you may end up with a ‘Hopper’ instead of wheelie Stander.
I prefer the ‘fake’ wheelie system described / coming up in H.O. Wheelie Stands – PART 2.
Per their article, you basically wrapped the pickup shoes and guide pin in electrical tape.
Also late in the ‘60s (again, I think Auto World) was a ‘wheelie kit’ for thunderJets. The following is basically the same thing as the wheelie kit you use to be able to get - with a small upgrade.
Start by taking the pickup area apart…

Using a piece of .015 styrene, Bend the front of each shoe over the styrene as shown, fit to chassis making sure of the proper alignment (e.g.- rail contact distance between shoes). Add a drop of Super glue to hold things in place.
Using the .015 styrene is my upgrade… the Wheelie kit you use to be able to get was too thick and often wouldn’t let both shoes touch the rail without much tweaking. Using the thin styrene lets the whole unit flex more easily for more even shoe contact.

Super glue the guide pin in place as shown

Using a toothpick, put a small drop of Super glue in the spring mounting hole of the chassis – DROP the spring in place (if you push or put any pressure on the spring, the glue will get into the coils)

Trial fit the new pickup system on the chassis. You may need to bend the shoe (holding hook) or bend up the plate a bit to get the shoe system to move freely. Things should be pretty loose.

Now time to stretch out the springs. DON’T stretch the spring a lot all at once, just a little each time between test runs (adjustments)..

You will need to add weight and adjust / stretch the spring tension as needed to get the results want.
SHUNT wires would also be a good idea (better contact, spring control, and will keep the shoe assembly ON the chassis)

Now, while this is a ‘real’ Wheelie system and does work, I will state here this is NOT my favorite wheelie system. It is not very reliable and will take a lot of tweaking to get the results you’re looking for. More often than not, you may end up with a ‘Hopper’ instead of wheelie Stander.
I prefer the ‘fake’ wheelie system described / coming up in H.O. Wheelie Stands – PART 2.


