|
|
Post by AJR on Jun 14, 2015 8:15:02 GMT -7
I thought I might post some progressive start to finish pictures of a build that I am doing. Not that I am the greatest at building these little cars or anything, but more to maybe spark some interest in customizing and bring attention to some of the vast post/threads that can be found all over the forum relating to this subject. For the really great builds be sure and check out posts from SKR, Eagle Racing, Hilltop Speedway, and Kdog just to name a few. The subject of my current project is a 1964 Ford Galaxy 500 that I want to turn into a Pro Mod. This particular body was in pretty rough shape when I got it and it's twin, but I was very glad to get them since it is a unique body that I don't see very often and they were free. I felt that I could clean it up and turn it into a pretty sharp looking car. This body came with no body mounts or windows. First pictures will take the build from start to the point of paint ready. 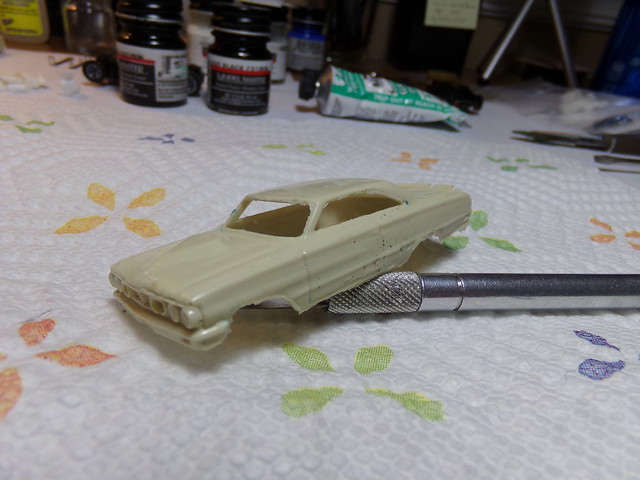 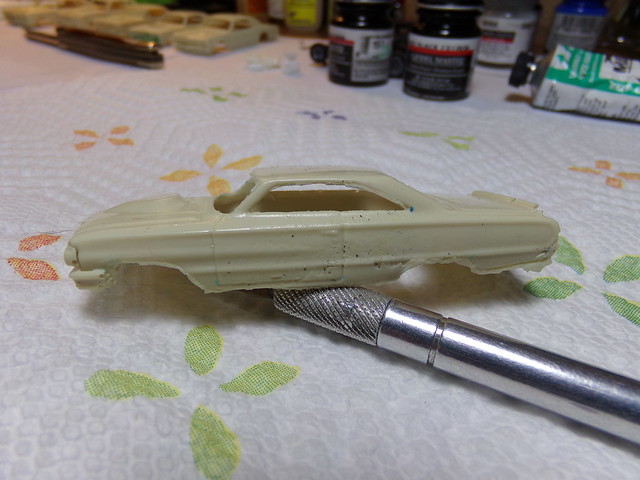 As you can see the body is pretty rough but most of it is down low and on the front and back of the car. I already removed some of the major flashing for these pics. 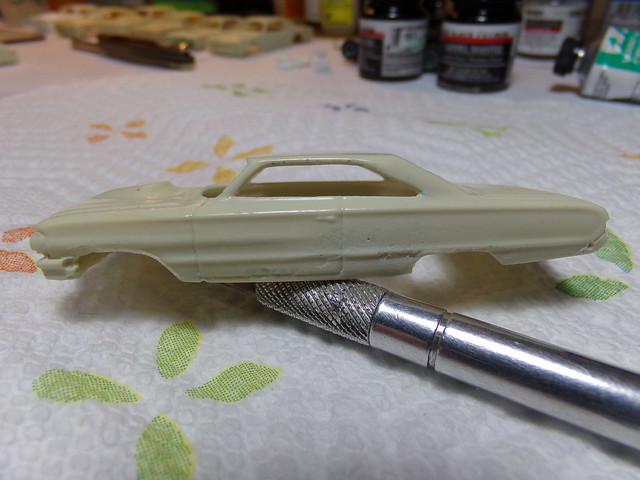 This pic shows the car after removal of more flashing and some block sanding of the resin just to take down any high spots that might exist. Removed the rear spoiler as well since I will be adding one of my own. Already looks much better. I use various grits of sandpaper folder over or wrapped around various objects to achieve my sanding needs for curved or squared surfaces. My wife recently brought me some "abrasive cosmetic sponges" that are working out very well. |
|
|
|
Post by AJR on Jun 14, 2015 8:28:56 GMT -7
|
|
|
|
Post by AJR on Jun 14, 2015 8:52:44 GMT -7
|
|
|
|
Post by AJR on Jun 14, 2015 9:04:50 GMT -7
OK.....ready for paint. I added a few more coats of putty and primer. Checking the body after each primer sanding to make sure I didn't miss anything. Like I said earlier, not only does the primer fill in the small imperfections and give the paint a smooth surface, but it also allows you to see what was missed. Some things can't be seen until the primer coat. The car is now ready for final sanding and then paint. 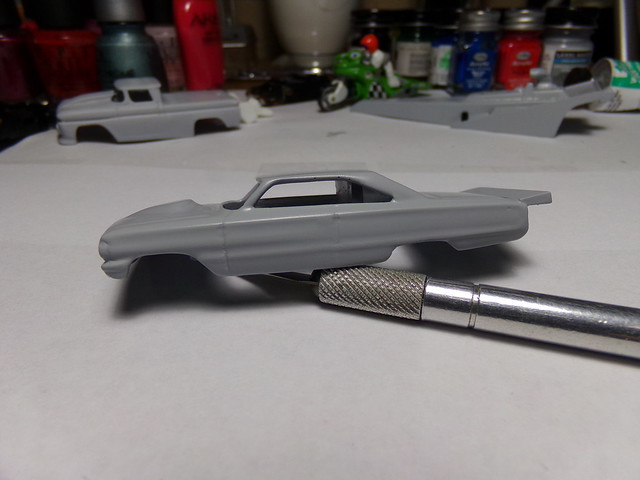 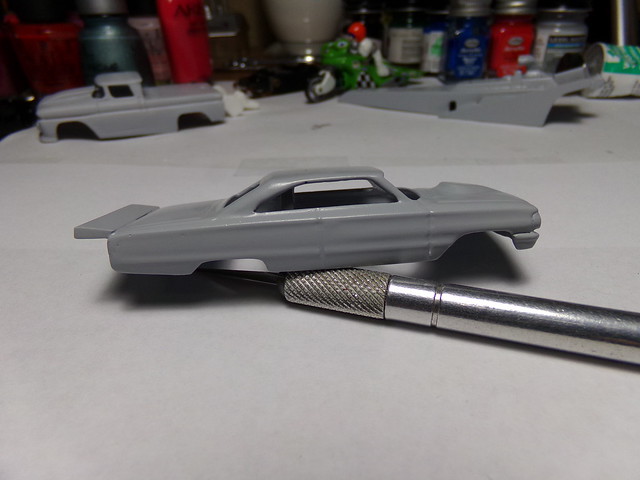 There are still a couple of small spots that I will clean up before sanding. All I need to do now is make my windows and it is ready for paint. 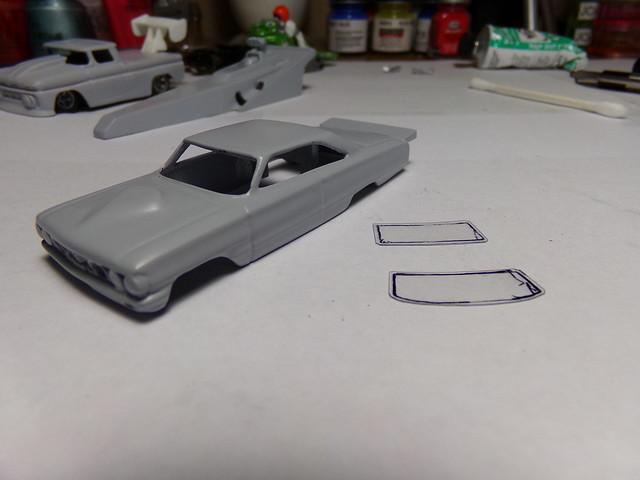 There are the windows.They will be installed after paint.That is one of my most stressful parts of the build because I am working with an otherwise finished body and fresh paint. Here is another awesome link for installing lexan windows. nitroslots.com/thread/937/lexan-windows-install?page=1Next up will be the painting part of the project. Let's see if I can pull that off. |
|
|
|
Post by Eagle Racing on Jun 14, 2015 12:16:22 GMT -7
Nice job on the tutorial for this car Jeff. Looking forward to the rest.
|
|
|
|
Post by SKR on Jun 19, 2015 16:35:51 GMT -7
I never thought of thinning body filler, I'll have to try it.Thanks for sharing this build.
|
|
|
|
Post by AJR on Jun 20, 2015 6:07:08 GMT -7
Credit goes to Eagle for the body filler thinning tip. I was having trouble with it drying too fast and he suggested it. Filler still dries very fast and it applies much easier.
|
|
|
|
Post by SlotWerx on Jul 4, 2015 23:29:02 GMT -7
Awesome write up and you are right that when Squadron putty starts to dry out it is no fun, great tip. Bolt on wings are more realistic than molded on wings as well. I have a couple of those bodies still and they always just have the right look to them.
|
|
|
|
Post by AJR on Jul 19, 2015 11:09:17 GMT -7
Took a break from the project to get some other cars built and tuned for the Summer Nationals. Now that the race is over, it's time to finish up the Galaxy. I was going to try and have it completed so I could use it in the race, but as it sometimes goes with these cars....I had some problems. I will post pics of the rest of the painting and detail but this is only to show the build progression. Not a "how to" on the painting part. I am still learning the ins and outs of airbrushing. I had an idea on how I wanted to do the paint. No name for the car...just some flames and sponsor decals is all I wanted to do. Colors were to be silver flames and cobalt blue main color. I started with the silver basecoat as seen below. 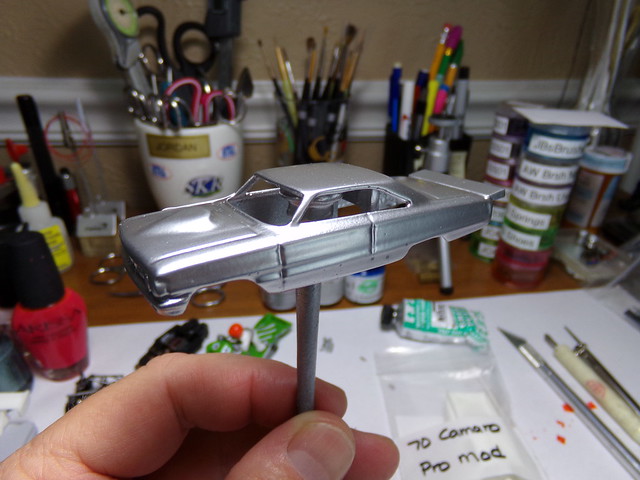 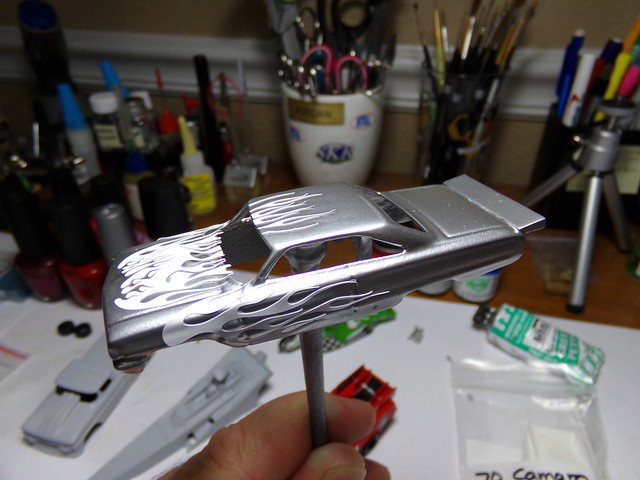 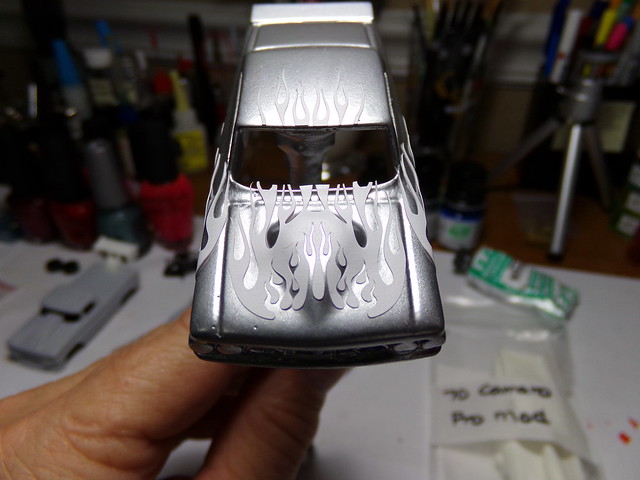 I then applied the flame stencils where I wanted them. These are Flamemask stencils that I am using. Their logo is at the bottom of the forum Home page and here is the link: www.flamemasks.com/zshop/index.php. I had trouble getting these to stick and stay down after burnishing for some reason. This added to problems I had later. I thought about not even posting about the problems that I had while painting, but that is something that nobody ever talks about. I wanted to show that even when there are problems, you can take a couple of steps back and still end up with a pretty sweet car. Things do not always go as planned with these little cars. Some of the issues that I had were paint getting under the stencil due to them not sticking well, the stencils did something to the silver basecoat where it contacted it, and problems with my main color adhering to the silver basecoat. I was able to clean up the flames and touch up some of the blue adhering problems to where everything looked like it was going to be ok. As I was putting on some of the sponsor decals, I decided to remove one that I did not like and it pulled the blue paint right off. These problems were my fault for not prepping well enough I guess. At that point I decided to sand the car back down and start over with a different paint design. Not what I originally wanted, but I am happy with the outcome. |
|
|
|
Post by AJR on Jul 19, 2015 11:26:51 GMT -7
|
|
|
|
Post by AJR on Jul 19, 2015 11:39:01 GMT -7
|
|
|
|
Post by SlotWerx on Jul 19, 2015 12:27:50 GMT -7
Great save! Personally I like the single color better! The details are what makes the car work when doing a single color scheme and you accomplished that.
|
|
|
|
Post by SKR on Jul 19, 2015 12:48:02 GMT -7
Nice low and bichin'. Thanks for posting your errors. I agree, it is best to strip the body back down if you are unhappy with the results. I had done that recently and was glad I did.
Not sure why you couldn't get the mask stencils to stick. One thing that I do is add a light clear coat (aka inter-coat)in between colors. This helps seal each color as you go and decreases the chance of the the paint lifting as you lay/remove tape over it.
|
|
|
|
Post by AJR on Jul 19, 2015 13:34:56 GMT -7
Thanks guys! I have previously soaked bodies in Pine Sol to remove paint and had good results. I personally like to start with a clean body. The only reason that I did not do that this time is due to the extensive bodywork that was done. I did not want to have to do that again. Waaaay too much paint on this car! I lost a lot of detail. Also , I think that my biggest problem was that I was mixing types of paints. My base coat was enamel and my blue was acrylic. I haven't had problems like this in the past, but the acrylic did not like the enamel. I now use a Dupli Color lacquer clear on everything......so that's makes 3 types. I am weeding out my enamels and going acrylic and lacquer. I seem to get much better results from lacquer. Sam thanks for that tip! That makes sense and I will be doing that from now on.
|
|
|
|
Post by hilltopspeedway on Jul 19, 2015 14:09:51 GMT -7
Cool save!!! I gave up on enamels a long time ago, just not worth it. I try to stick with lacquers. I'd also suggest the Duplicolor High Build primer. I'm like Sam, I like to add a coat or two of clear over the base color, then if you get a little (of your second color overspary) on the first color, you can lightly sand it off. Also like to add a coat of clear before applying decals. After the clear dries, you can scuff/sand the clear with some 2000, then apply your decals, then topcoat again with clear. Seems to let the decals lay down better...RM
|
|