|
|
Post by SKR on Nov 27, 2010 10:49:38 GMT -7
Thanks Randy, I wanted to use the driver you sent but I figured the tech director would frown on the open face helmet  Sounds good Ron, I'll make a gang mold of a few different cages. Did some thrashing on this one. Still more contouring to do on the bumper/grille and much more smoothing out of the hood ornament. 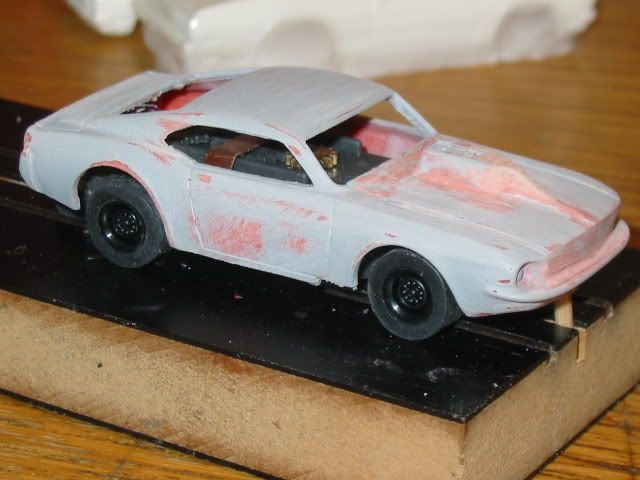 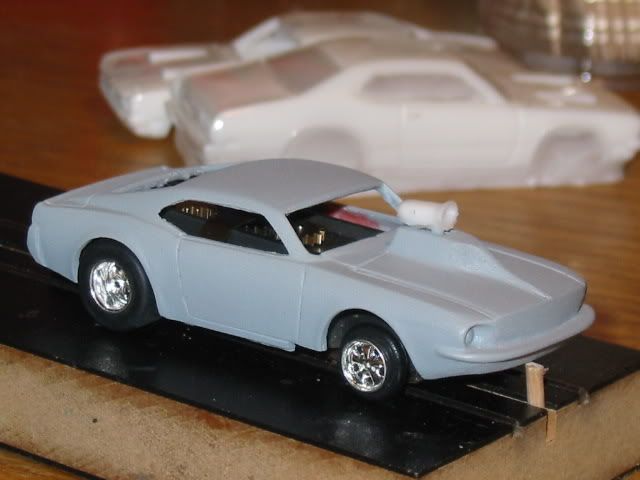 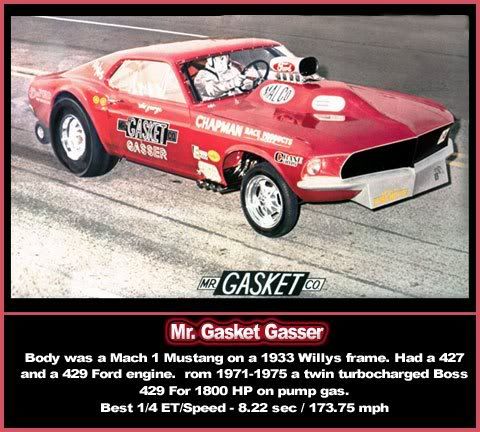 |
|
ol55
Pro Stock
  
Posts: 117
|
Post by ol55 on Nov 27, 2010 12:46:36 GMT -7
lookin good SAM i like it alot. ol55/johnny
|
|
|
|
Post by SKR on Nov 28, 2010 13:58:39 GMT -7
The Demon: Part 1 It was great to finally get some projects underway on this long weekend. Heck I even got a start on the Demon P/M. Having multiple projects going is a good way to get the most out of your hobby time. When one project has paint, primer or filler drying, you can be working on the other. The body I'm using is too narrow for my liking so I decided to widen it up a bit. To start off I measured and marked the center of the body. 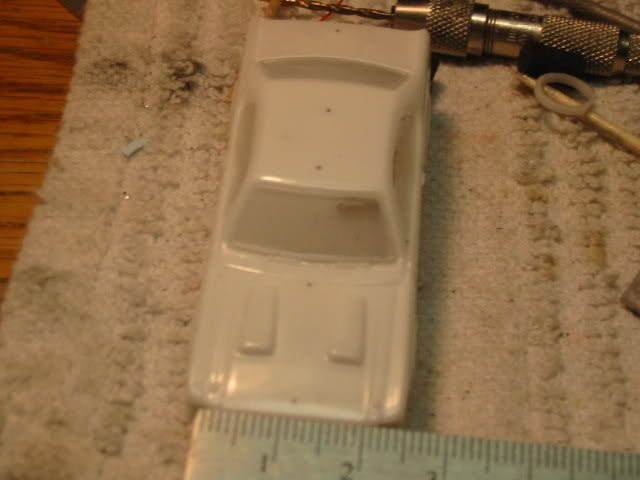 After making some reference points I taped just to the left of the marks with some 1/16” tape 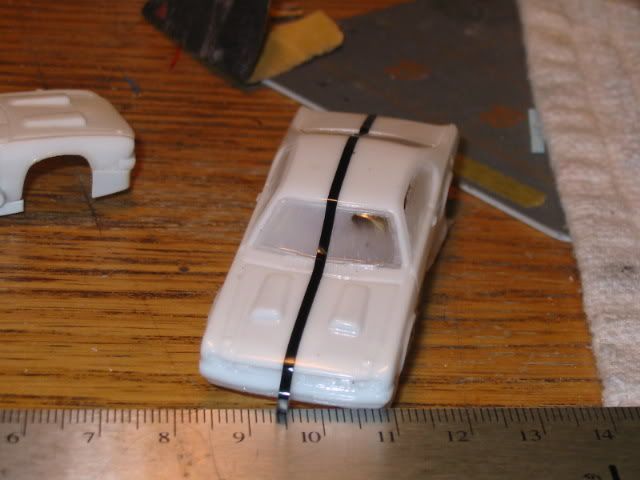 Next I taped along side of my first line leaving enough room to fit my razor say in between. This will allow me to help make the start of my first cuts without the razor saw moving around 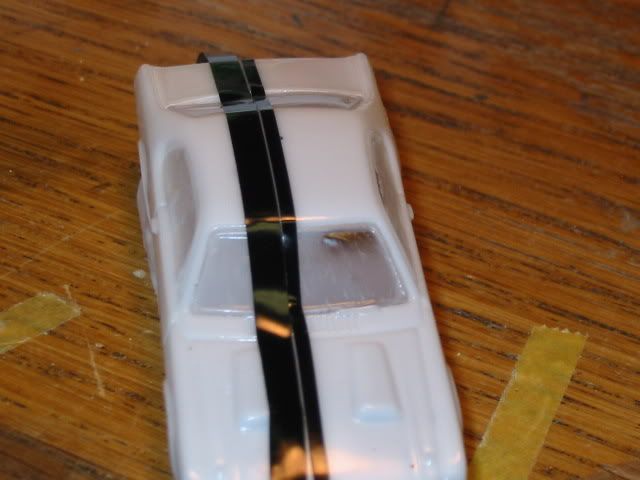 Demon came by to help chop this mother up but............. it turns out he doesn't know what he is doing with that chain saw. His Momma said he couldn't handle the gas powered one and she was right. Should of stuck with the electric knife bud!  Started my first cut on the roof and moved down to the hood. I cut the trunk section last. 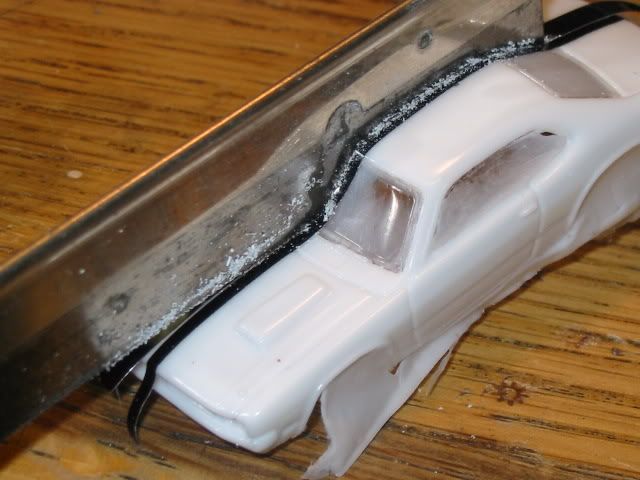 This is how the big boys chop stuff up Demon... 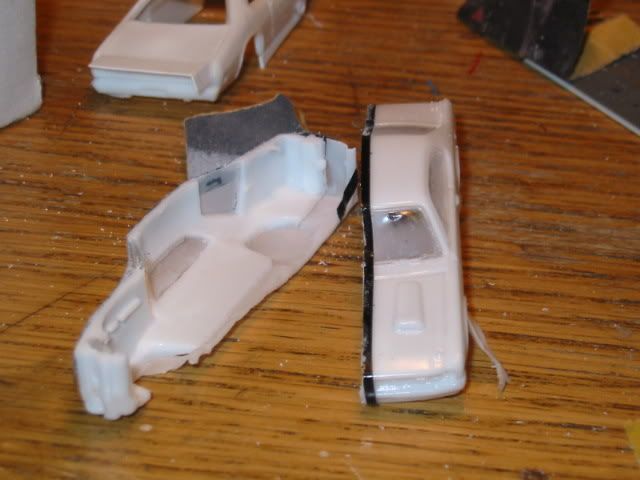 Now that you have your first half it's time to go back and do the same with another body but this time your going to move your tape to the right of the center line before chopping. I used super glue to join both halves together. 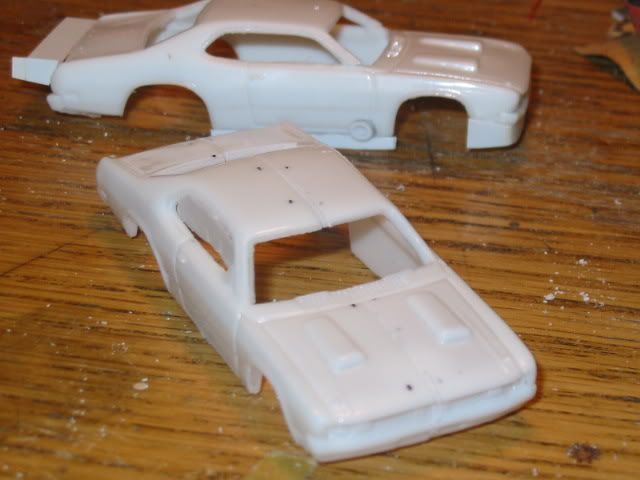 After the super glue set up a bit. I took my cutting wheel disk on my dremel and lightly went down the center in between the halfs to create a slot. 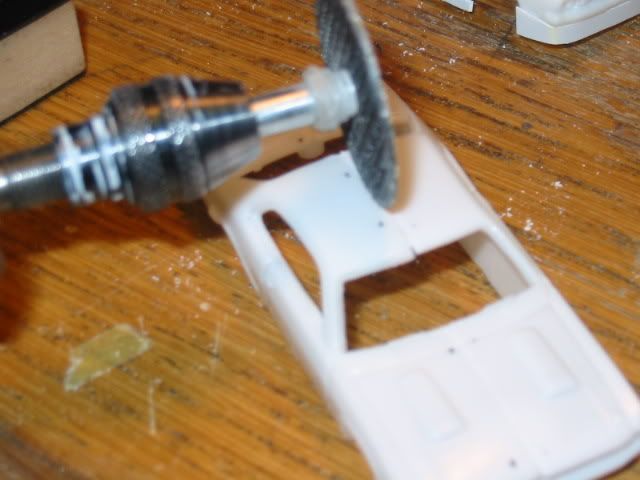 I then used JB Weld to fill the gap back in. Once it dries I'll sand it smooth. I'm not worried about the grille and such because the 1/1 Pro Mod is pretty much filled in flat, which I'll do the same. 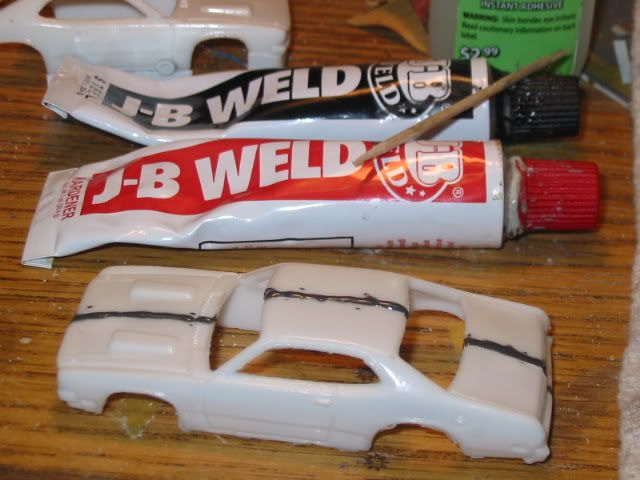 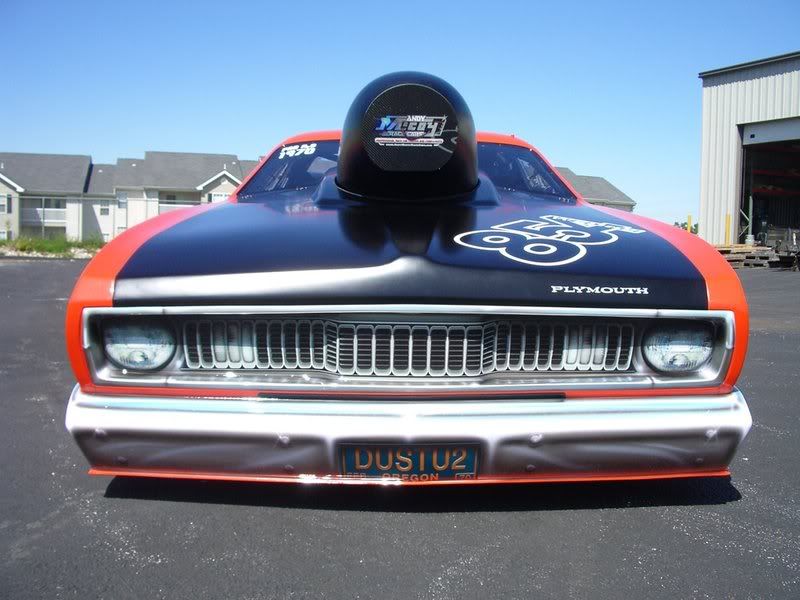 Next time I'll start the big hood ornamaent. This thing looks massive, makes some of mine look like a cowl scoop. I wonder if these P/M racers are compensating for something. ;D 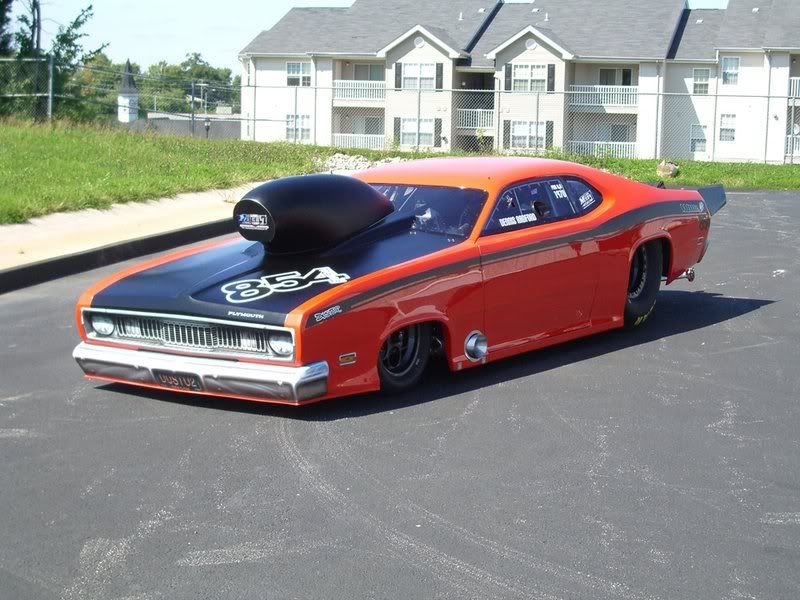 |
|
|
|
Post by sst1610 on Nov 28, 2010 14:41:48 GMT -7
Looks great Sam, I know what your talking about with multiple projects going at once. Its nice, i just have to find sometime to get down in the shop.
|
|
|
|
Post by SKR on Nov 28, 2010 15:04:49 GMT -7
Demon P/M Part 2 To start I printed a picture of the scoop I want to replicate to use as a reference. Next, I drew a rough outline of how I want the scoop to look. 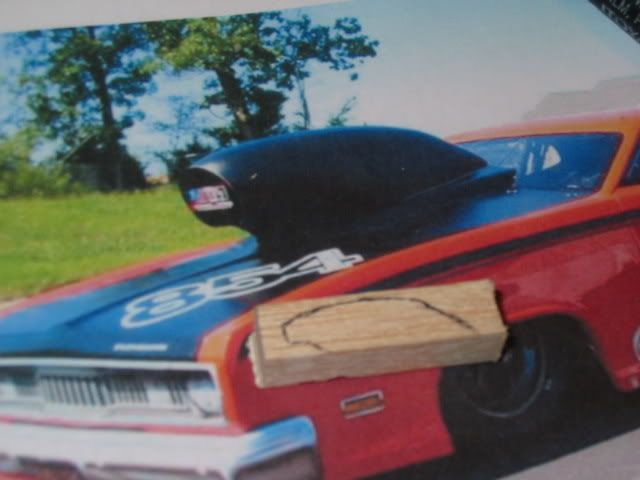 Use an X-Acto knife to cut off some of the excess. 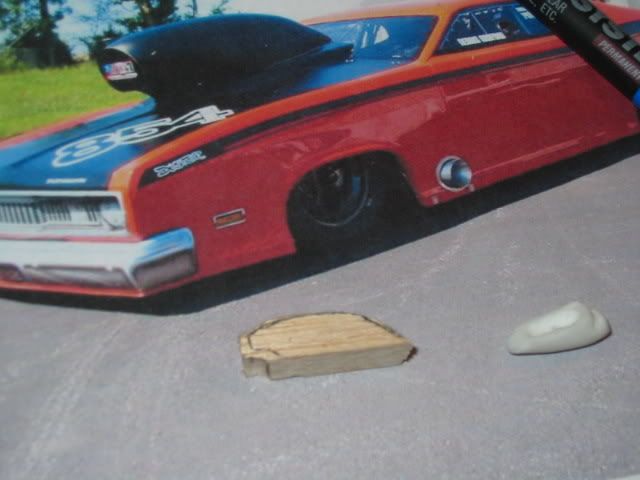 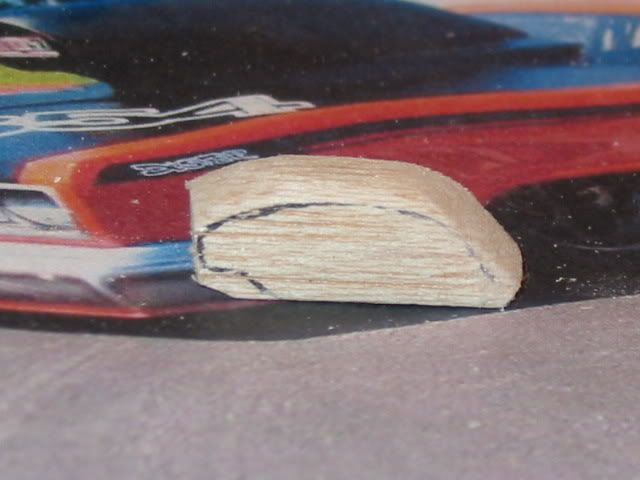 Next I'll draw where the scoop opening will go. It's easier for me to work on one side before trying to simulate the opposite side. I use 220 grit sand paper to start and when I get close to where I need to be I'll switch over to 400 grit. 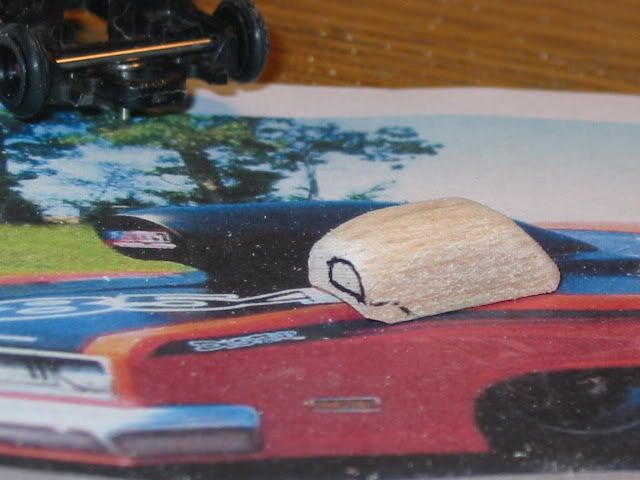 Starting to look a little like something 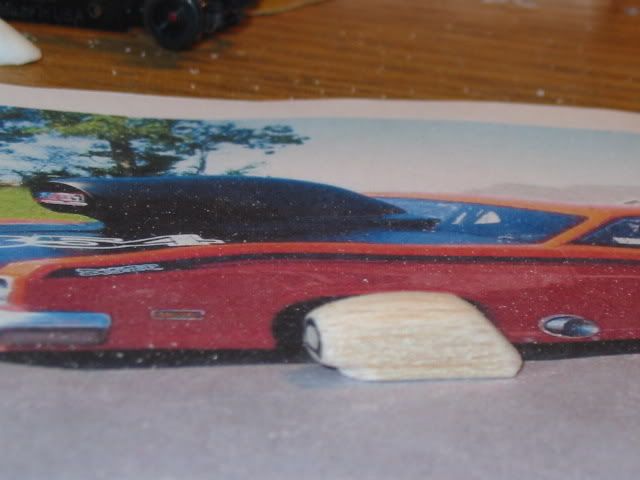 I'll need to chop this one down some more. Keep in mind that I'll be dropping the roof a little so this scoop would really tower over it if I don't lower it a bit. I also need to add a small cowl scoop underneath this one. 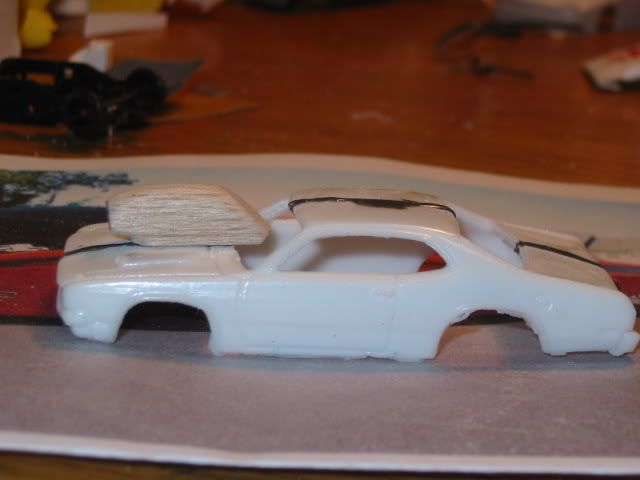 I hope to finish up the scoop by next weekend in between other projects so I can move on to the body to drop the roof, flatten the sides and drop the front wheel openings. |
|
ol55
Pro Stock
  
Posts: 117
|
Post by ol55 on Nov 28, 2010 18:27:07 GMT -7
SAM you amaze me everytime i look at your work. just awesome talent you have.seem every time i check out this site the members blow me away with slots you all build. keep up the great work and the pictures rock. love to see how you chop up the body. LOL i also wonder bout those LARGE scoops on the p/m's ol55/johnny
|
|
|
|
Post by rickvoegelin on Nov 30, 2010 8:31:11 GMT -7
Yeah I lucked up on this one. I was just about to start making one out of piano wire before I came across the die cast NF/C. This cage is plastic so it worked out well. If your not going to use that cage right away and want some extras.. send it to me and I'll make a mold of it. Sam, How do you guys make a mold of a complex tubular shape like a roll cage? I've wanted to make resin castings of exhaust headers and nerf bars for a circle track project, but can't figure out how to make the mold so that it fills with resin and still allows me to get the part out. All advice appreciated! Thanks, Rick V. |
|
|
|
Post by SKR on Nov 30, 2010 22:10:49 GMT -7
Rick, This will be my first attempt at doing a cage and can only show you how I'll approach it. I'll fill the inside with clay then go around each bar with a toothpick to clean off the excess clay. Try and picture the clay as the second half of your mold so you want the outside bars exposed and no gaps that will lead to the RTV wrapping around the bar entirely. I'll let you know how it comes out. If anyone has done a roll cage..... I'd like to hear any suggestions you may have. Just a quick picture of the cage with clay. This still needs cleaned up but it gives you an idea of where I'm headed. 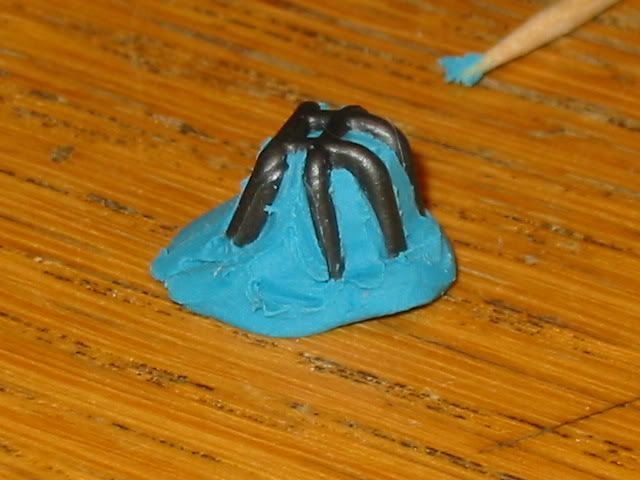 I've been placing headers like this for my first half. Push the part down in the clay then clean around the base with a tooth pick 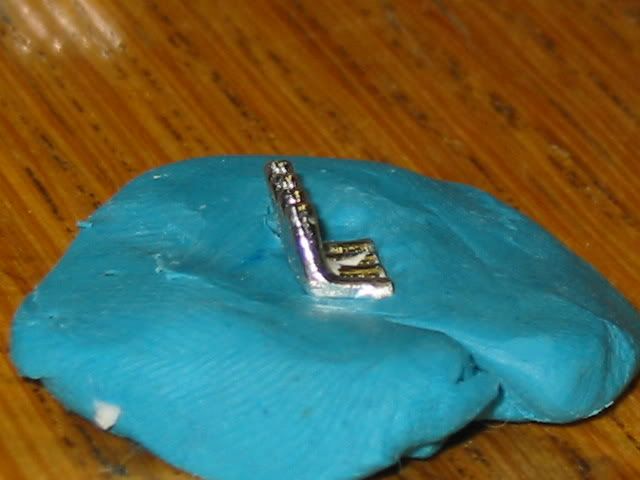 |
|
|
|
Post by rickvoegelin on Dec 1, 2010 8:10:35 GMT -7
Rick, This will be my first attempt at doing a cage and can only show you how I'll approach it. I'll fill the inside with clay then go around each bar with a toothpick to clean off the excess clay. Try and picture the clay as the second half of your mold so you want the outside bars exposed and no gaps that will lead to the RTV wrapping around the bar entirely. I'll let you know how it comes out. If anyone has done a roll cage..... I'd like to hear any suggestions you may have. Thanks, Sam, that looks like a more practical technique than what I came up with. Keep us posted on progress after your first pour, fingers crossed that it works as planned. Cheers, Rick V. |
|
|
|
Post by hilltopspeedway on Dec 1, 2010 9:44:09 GMT -7
Sam, Don't know if you tried it, next time you have some left over silicone from a pour, stick those headers down into, tube first, and let the flat backside area just float on top of the silicone. It will usually stay suspended. If it tries to flop over, lay a toothpick or light weight on the edge to keep it level. This creates a one piece mold which is always handy for leftover resin pours...RM |
|
|
|
Post by SKR on Dec 2, 2010 22:10:32 GMT -7
Thanks for the tip Randy. Did a little work on the Demon. Sanded down the scoops on the hood. I had to fill the underside with JB Weld before I sanded them down. Otherwise I would have had some holes on the hood. I also sanded the seam down the middle of the body. 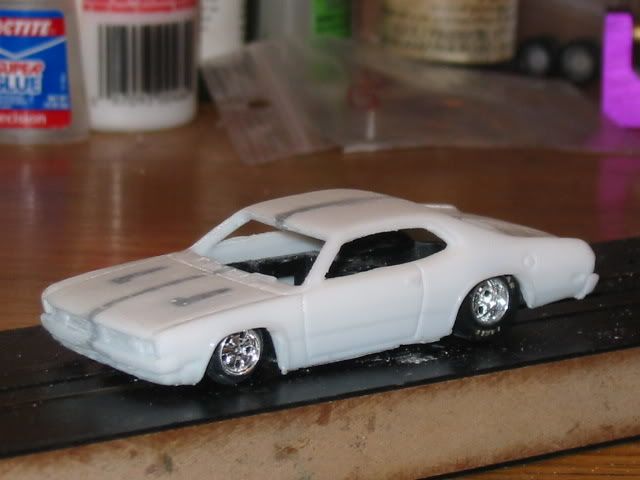 Here are some shots of how I'm dropping the roof. Cut the bottom of the window pillars. Sand the bottoms to line back up with the body line as best possible. I added some super glue to the bottom of each pillar, wrapped tape around the roof down to the doors to hold the roof in place then added some JB Weld. 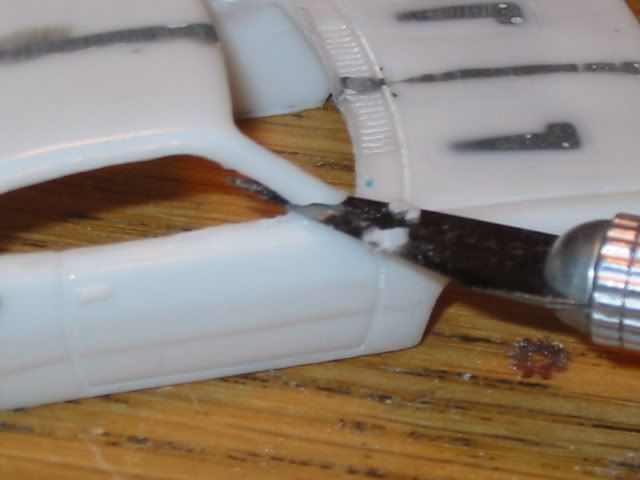 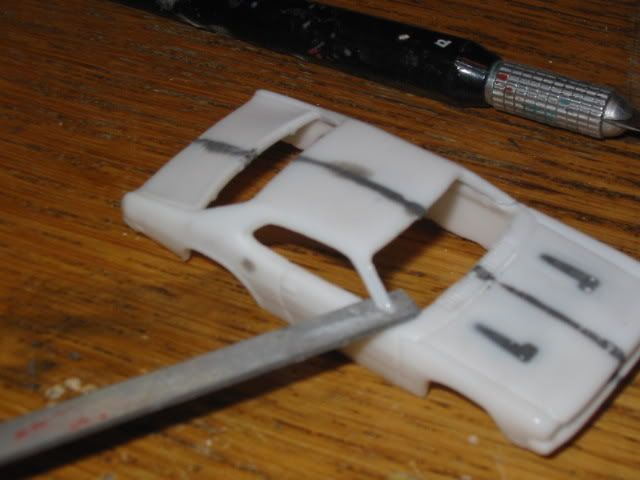 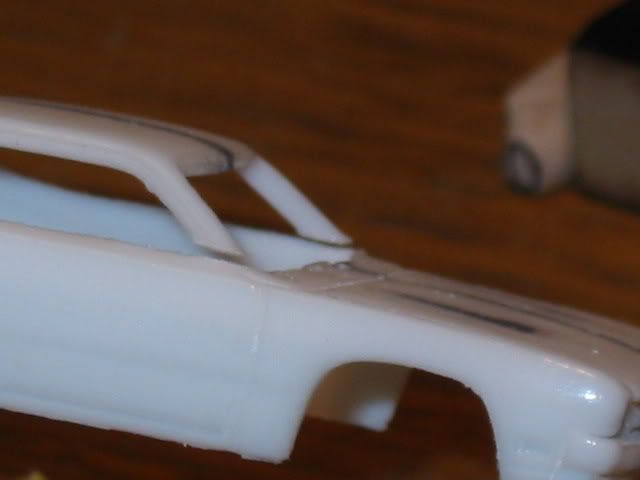 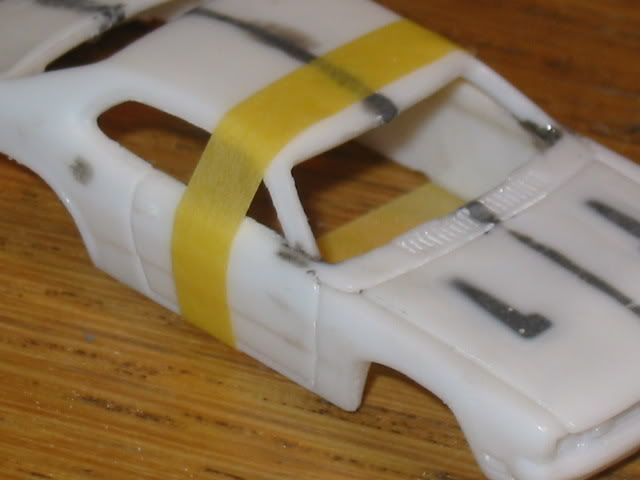 I like how flat this rear is from the roof to the end of the trunk. I sanded the top of the Demon a little and will do some more later after my first primering. I try to not do it all at once but rather in gradual steps. It's always easier and saves some time to take a little off then to take too much off and have to build it back up with filler and re-do. 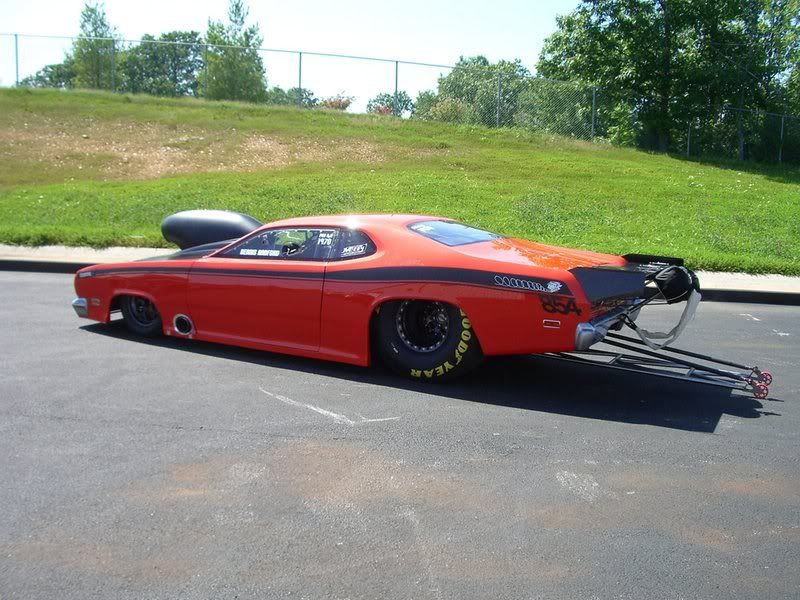 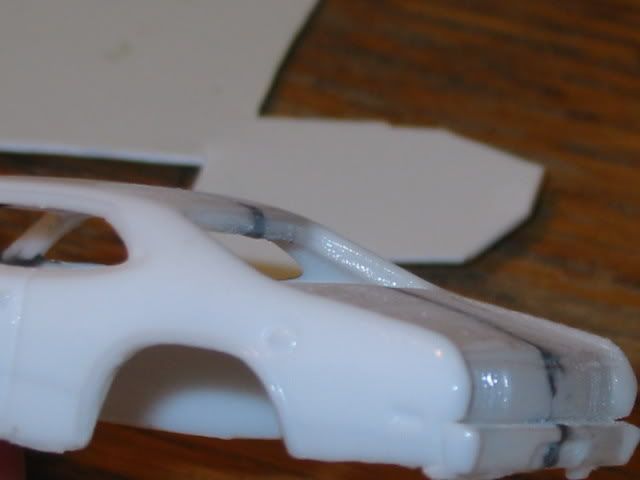 Here is the start of my cowl scoop. Just cut a piece of styrene and bond it to the hood. I'll add some filler around the edges and sand to shape. 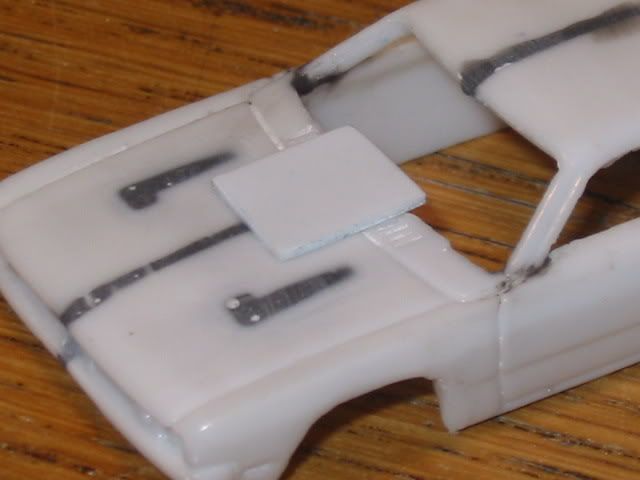 No doubt one of the most notable body characteristics is the front wheel wells. Chopped up some styrene to fill in then covered with JB Weld. Also you can see I put some filler on the doors, front and around my cowl scoop. I was going to extend the doors down and the front end but after looking at the pictures somemore, this car is pretty sleek and wedge like. This body looks like hell here  , It should look much better by the end of this weekend. 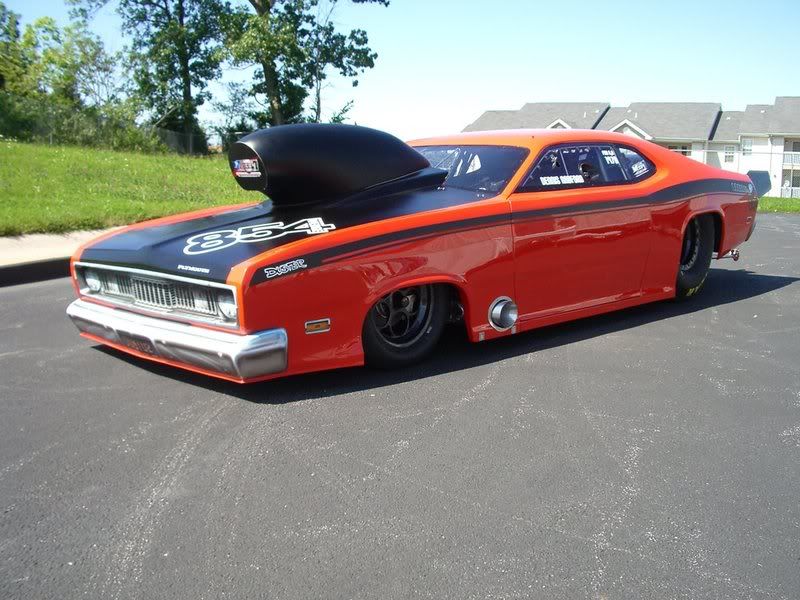 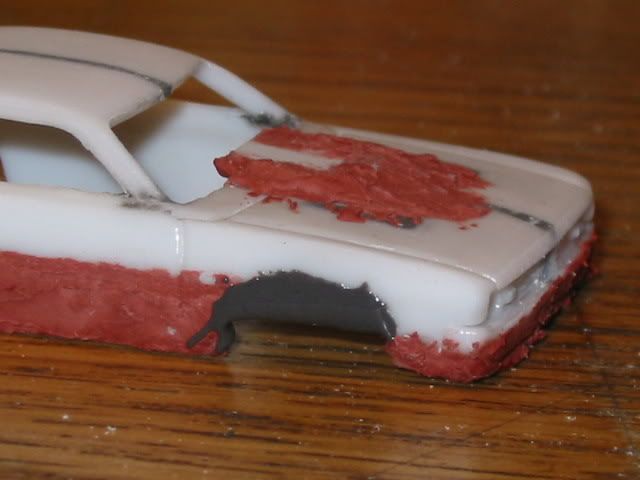 |
|
ol55
Pro Stock
  
Posts: 117
|
Post by ol55 on Dec 2, 2010 23:07:45 GMT -7
SAM i am so excited to see this one finished. truly a work of art.
|
|
|
|
Post by SKR on Dec 3, 2010 6:44:24 GMT -7
Thanks Johnny! Ok Dodge guys. Who knows what year this body is modeled after? I know the Dusters looked the same for some years but is this one a certain year because it was a Demon? and if the Demon lasted longer than a year, can you tell me what year this is by looking at the grille? Thanks Sam 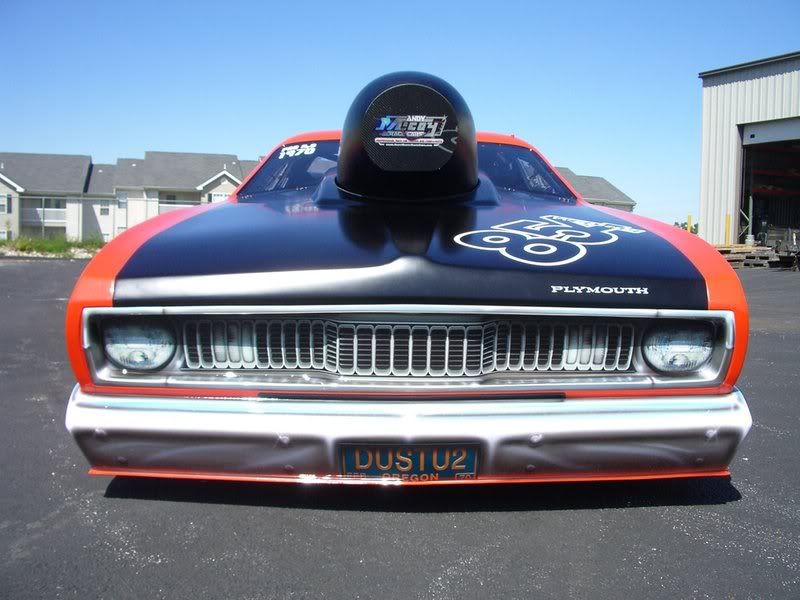 |
|
L_Brown
Pro Stock
   Larry Brown - North Texas
Posts: 347
|
Post by L_Brown on Dec 3, 2010 7:17:48 GMT -7
OK, I found out its a 1970.
|
|
|
|
Post by SKR on Dec 3, 2010 8:00:16 GMT -7
Cool Thanks for posting that Video. That car is pretty BAD A!  |
|