|
|
Post by dave632 on Dec 4, 2016 11:21:21 GMT -7
ELECTRICAL: I was an electronics tech in the past so I hope I can still solder. My first contribution will be adding braid to pickups. This is a simple process but you must have some soldering ability. You will need: A soldering iron.  Weller 40 watt iron Weller 40 watt iron
Solder.
 Rosin core solder Rosin core solder
Braid, called solder wick, cheap on E bay.
 Solder wick various types Solder wick various types
I use the 3.5 but the others work fine.
 3.5 solder wick 3.5 solder wick
Any type of pickup will do, here I use an AFX style. Even worn ones will work fine.
 Stock pair before Stock pair before
I sand the front bend of the pickup before soldering.
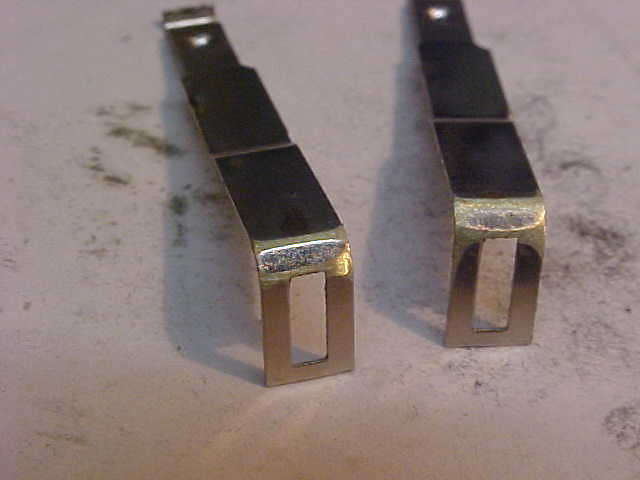 Stock pickups with edge sanded Stock pickups with edge sanded
Putting the pickup in a vise I tin the edge of the pickup.
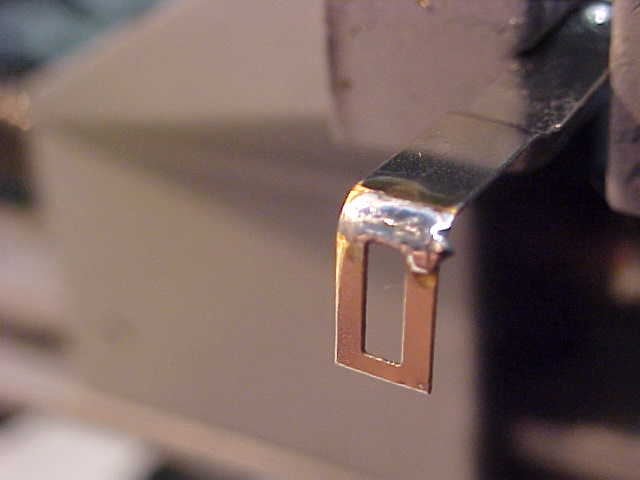 Tip of pickup tinned Tip of pickup tinned
Next I hold the cut piece of braid, about 1/2" of braid was used, to the pickup with a jumper clip end. I bend the braid end slightly so that it glides over the track better, you don't want a sharp edge here.
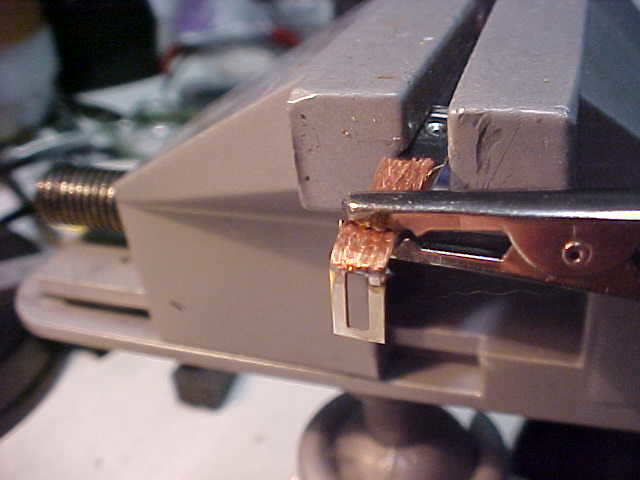 Pickup with braid ready to be soldered Pickup with braid ready to be soldered
Next solder only the tip of the braid to the pickup.
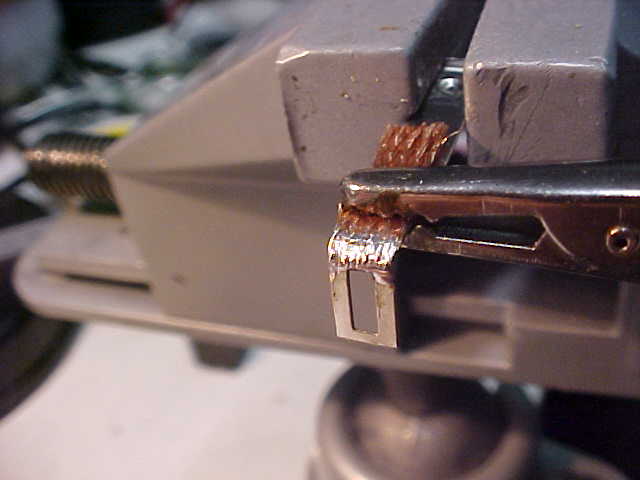 Braid soldered. Braid soldered.
The process is complete, now just re-install the pickups.
Used this Buick GN for testing it is a good running 14 ohm stocker.
 Buick GN Buick GN
Without the braid.
 Stock AFX pickups Stock AFX pickups
 Buick Buick
With the braid.
 Buick after Buick after
 Buick after install Buick after install
What happened!!! the ET is slower? There were 2 runs preceding this one that are not pictured where the ET and MPH was even slower.
This is a stock AFX Magnetraction car with no traction magnets.
If you look at the 60' times it was now blowing the tires away at the start with the extra power. It was clearly visible watching the car run. First run with the braid, 1.10 14.41, #2 1.029 15.86, #3 .8854 17.35. Pretty good MPH for a 14 ohm car. I did some tire cleaning to get the better times. This car clearly needs traction magnets now.
Took a car with traction magnets and tried it.
This one is a 69 Camaro with a mean green arm.
 69 Camaro 69 Camaro
Without the braid.
 Camaro before Camaro before
 Camaro before install Camaro before install
After install.
 Camaro after Camaro after
The before times were .868 60', .8411 ET 15.64 mph
After times, (sorry I missed the picture), .798 60' .7240 19.21 mph over a tenth in ET and over 3 MPH better.
With enough traction the extra power shows in all parts of the run, unlike the car with limited traction. |
|
|
|
Post by bluesguy on Dec 6, 2016 18:31:11 GMT -7
Awesome post! Great info and pics. Answers all the questions I had. And you showed proof of your performance upgrade.
Thanks Dave, you da man!
Mike
|
|
|
|
Post by dave632 on Dec 6, 2016 19:10:21 GMT -7
Thanks Mike,
That is one of the best upgrades for the price, less than .05, you can make to any HO slot car. Some react very well to the change and others not as much but all improve some.
Dave
|
|
|
|
Post by dave632 on Oct 6, 2018 15:00:09 GMT -7
Renewing this post.
|
|
|
|
Post by dave632 on May 24, 2019 20:14:03 GMT -7
Renewing this post again as I feel it is a very important one and we have no tech section right now.
|
|
|
|
Post by AJR on May 25, 2019 6:02:28 GMT -7
Renewing this post again as I feel it is a very important one and we have no tech section right now. I agree this is one of the important ones, but "Tech Tips" is the tech section. Dave have you ever used tinning flux? I use it in plumbing soldering and tried it on the hobby side years ago and it works very well. I know that you tin work, but this kind of eliminates that step and seems to create a better base for the new solder than the rosin core alone provides. I will post my method here which closely resembles yours. The tinning flux I use is called "C Flux" and it is actually for plumbing. Awesome stuff! |
|
|
|
Post by dave632 on May 25, 2019 8:32:01 GMT -7
I use soldering flux but have never tried C flux. Some of those are very acidic and could cause harm to some electrical circuits such as PC boards. I don't think we would have that
trouble with our cars. I will look for it and give it a try but I don't have much trouble soldering.
I found the Tech tips under the board sections, is that a recent addition? I remember mentioning that we needed a tech tips section and you were going to check with Sam.
|
|
|
|
Post by AJR on May 25, 2019 11:18:26 GMT -7
I use soldering flux but have never tried C flux. Some of those are very acidic and could cause harm to some electrical circuits such as PC boards. I don't think we would have that trouble with our cars. I will look for it and give it a try but I don't have much trouble soldering. I found the Tech tips under the board sections, is that a recent addition? I remember mentioning that we needed a tech tips section and you were going to check with Sam. I was just making a suggestion with the Cflux for you, but also for other forum members. Also not suggesting it for any circuit boards. I have been using it in the hobby for 6 or 7 years with no problems. Maybe others would like to give it a try. It just makes it a little easier for the beginner. "Tech Tips" section has been there for quite awhile. We could use a button at the top of the Home and Main forum page though. |
|
|
|
Post by AJR on May 25, 2019 11:58:12 GMT -7
A great thread here and very valuable information. Braids are about the easiest way to pick up speed and power as Dave632 has shown in his posts. I thought I would contribute to the thread with my method of installing braids. Fundamentally it is the same as what Dave has done above, but I do a few things differently and do a couple of things he does not. Solder connections have to be CLEAN or the solder will not flow properly where it needs to. Also the work has to get UP TO TEMPERATURE or the solder will not flow properly. A little bit of solder goes a long way. With those things in mind.....this is how I do it. My method of doing it is just a modified version of some other instructions I found somewhere here in Tech Tips.  These are the materials needed to get started. Minus the soldering and braid stuff.  I choose two good candidates for the braids out of the pile. I normally use some older ones. They don't have to be new. I am using two AW stock step pick ups.  The soldering iron is a very basic 15/30watt from Radio Shack, the Cflux I mentioned, some basic RS 60/40 rosin core solder. Even though I am using the Cflux, I still like to use the rosin core (flux core) solder. It doesn't hurt. I miss Radio Shack    Then I have the braid material. I currently have 3 types. Today I'm using the larger braid. Now it's time to prep for the first braid. |
|
|
|
Post by AJR on May 25, 2019 12:07:10 GMT -7
 First thing I do is clean the pick up where the braid will be soldered. I will usually clean about a 1/4" back from the hanger and also the small area just above the hanger. The Dremel is how I do it, but a piece of sandpaper will also work. 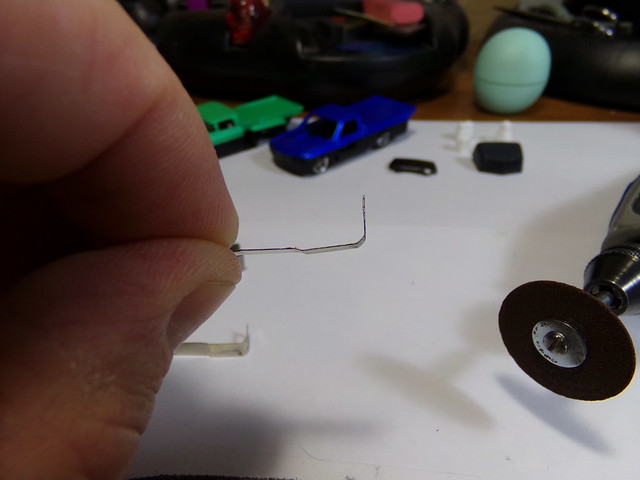 The braid will take up a lot more space under the chassis than the flat pick up did. I like my cars to ride on the front wheels, not the pick ups or braids. So I definitely do not need a stepped shoe. I flatten the step out with the flat jaw pliers that were in the first set of pictures. 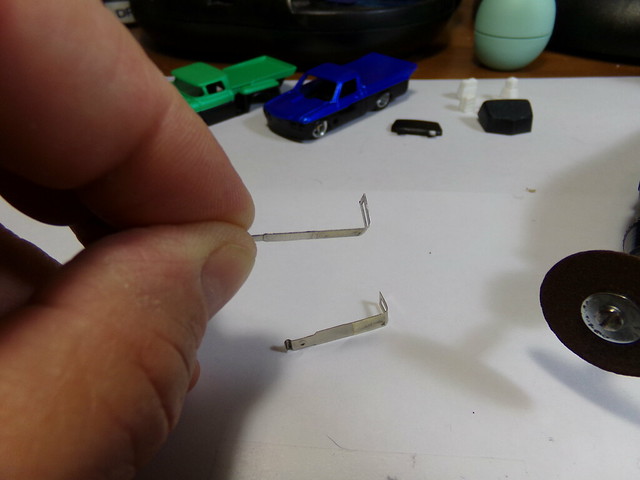 This how they look flattened. |
|
|
|
Post by AJR on May 25, 2019 12:17:34 GMT -7
 Now I cut my braid material to the length I want it. Once again, with underneath clearance in mind, I do not want the braids going too far back. I stop well short of the spring well.  Using the flat jaw pliers, I bend the front edge of the braid so it will hook over the edge of the shoe.  Then I take the hemostats and position the braid where I want it and clamp it down about 1/16" behind the hanger edge. 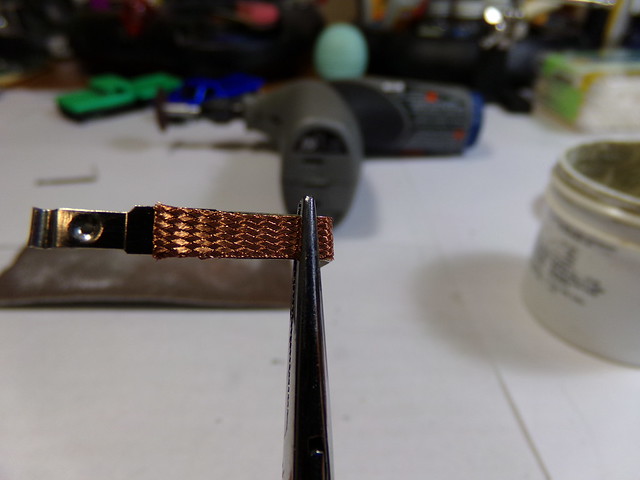 Now I'm ready to solder. |
|
|
|
Post by AJR on May 25, 2019 12:24:12 GMT -7
 Cflux is a paste that actually has solder in it. It is what's called a "tinning flux". There are other brands.  Using a toothpick, I apply a small amount of Cflux to the edge. Don't need much. 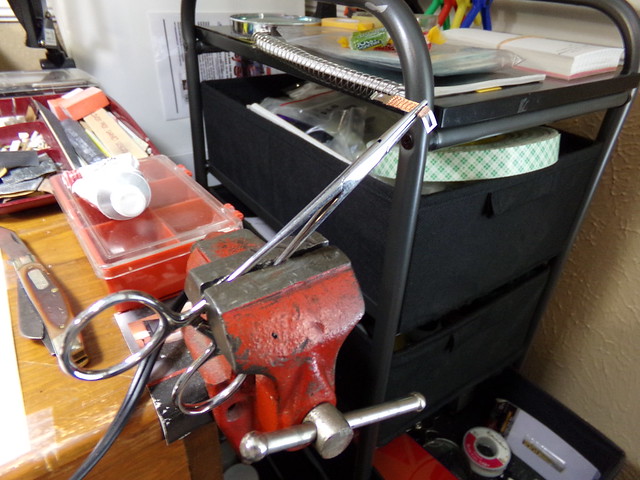 I put the hemostat in my vise like this. Ready to apply the solder....... |
|
|
|
Post by AJR on May 25, 2019 12:38:09 GMT -7
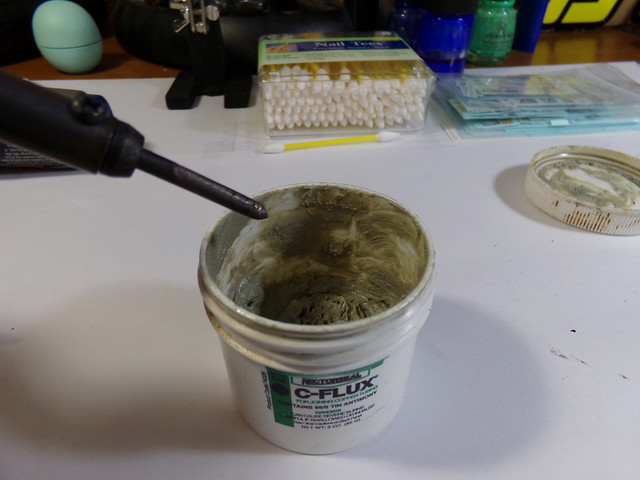 Before turning on the iron I check the tip. If it's really dirty I will take some sandcloth to it and clean it up. Then I will turn it on and once up to temperature I put the tip into the flux quickly just to tin it.  Then I melt a small amount of solder onto the tip. Remember a little bit here goes a long way too. It's harder to take solder away than it is to add it.  I lay the tip of the iron on the edge with the Cflux and the solder will flow from the tip to the braid and the shoe. Some of the solder will flow under the hemostats, but it will be very flat. That's why I like using them.  This the finished braid. No filing necessary. It is flat. Notice the black spots. That is the burned flux. It will need to be cleaned with alcohol because it will cause corrosion and act as an insulator.  This the finished shoe all cleaned up. Easy as pie!!  Ready to install. Hope this will help somebody. |
|
|
|
Post by dave632 on May 25, 2019 17:26:45 GMT -7
Good info Jeff, I forgot to indicate that I do clean the area where I am going to solder. Glad you brought up that point.
I agree we could use a button on the home page for tech tips.
|
|
|
|
Post by GTS on May 26, 2019 6:04:01 GMT -7
Excellent !!!
|
|
 Weller 40 watt iron
 Rosin core solder
 Solder wick various types
 3.5 solder wick
 Stock pair before
 Stock pickups with edge sanded
 Tip of pickup tinned
 Pickup with braid ready to be soldered
 Braid soldered.
 Buick GN
 Stock AFX pickups
 Buick
Buick Buick after
 Buick after install
 69 Camaro
 Camaro before
 Camaro before install
 Camaro after
 Weller 40 watt iron
 Rosin core solder
 Solder wick various types
 3.5 solder wick
 Stock pair before
 Stock pickups with edge sanded
 Tip of pickup tinned
 Pickup with braid ready to be soldered
 Braid soldered.
 Buick GN
 Stock AFX pickups
 Buick
Buick Buick after
 Buick after install
 69 Camaro
 Camaro before
 Camaro before install
 Camaro after


