|
|
Post by SKR on Jun 16, 2008 8:22:57 GMT -7
Kim's other car is this Wagon that she'll be running at the 2008 S/S Nat's. I'll do a step by step paint job on this one. Here is the body before primer. It's a Gmead resin kit. I shaved the body post down to lower the stance. Should hit primer tomorrow. 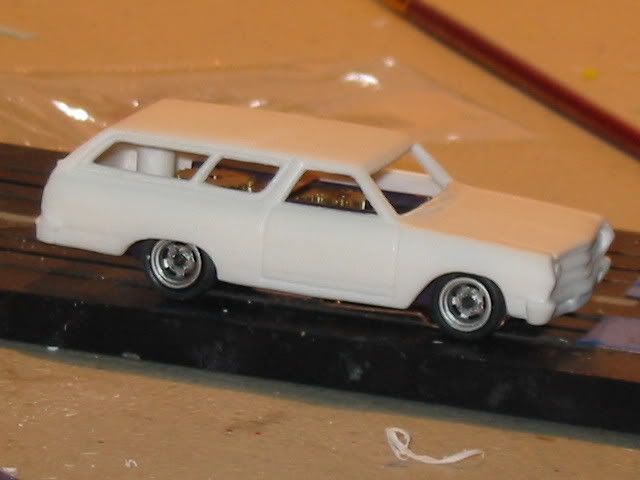 |
|
|
|
Post by johnbalich on Jun 16, 2008 9:54:36 GMT -7
looking gooooooood I have always liked superstock wagons......will Kim go to the supermarket in this station wagon?? or just use it to carry someone to their 'trailer' at the SS NATS?
|
|
|
|
Post by SKR on Jun 16, 2008 14:09:53 GMT -7
LOL. I wouldn't mention that too loud (grocery getter). It'll be a racer and possible beer runner  |
|
|
|
Post by gm454 on Jun 16, 2008 17:05:59 GMT -7
Sam, that looks good with the narrow wheels and the body slammed. I trimmed the post down a bit on the Grim Reaper wagon that I did but I couldn't go as low with the regular width RRR wheel/tires that I have on the chassis. I may have to get a few sets of those narrow wheels.
|
|
|
|
Post by SKR on Jun 17, 2008 11:39:56 GMT -7
Great work on this body Gary, easy clean up. The narrow wheels makes it easy to lower. If a guy wanted too, they could really slam it. Might make for a cool surf wagon by adding some surf boards or snow boards for us High Country folks.  |
|
|
|
Post by da big ragu on Jun 17, 2008 13:24:21 GMT -7
 hi sam your one hell of a guy you don't have to hide in the closet if you really like chevy's just come out ;D look rosie and her pal's are out don;t be scared
|
|
|
|
Post by kdog on Jun 17, 2008 13:31:29 GMT -7
WOW
|
|
|
|
Post by SKR on Jun 17, 2008 13:38:40 GMT -7
Hi! my name is Sam and I'm a Chevy Lover  Da BIg Ragu is killing me. It's all good. I think I'll have to drill out the body post deeper to fit this bad boy in there. Kevin, do not remove the rear screw on this body.  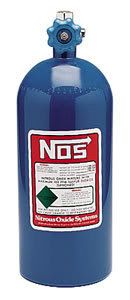 |
|
|
|
Post by SKR on Jun 17, 2008 15:13:13 GMT -7
Here we go. Let's start off with a Disclaimer: The following steps are how I paint bodies and might differ from others. If you have any special tricks that work for you, please share. I hope it helps or inspires you to take on a repaint project or build a resin kit. Also, don't feel you need to try a multi color paint job your first time out. Many of my favorite cars in my personal collection are one color with decals. And as always, you can ask questions here or through private message on this forum. I was able to get some primer on it yesterday. I put 1 light coat followed by 2 medium coats using white Krylon Primer. Let your primer dry between coats. I waited 30 min after the light coat and 1 hour between medium coats. 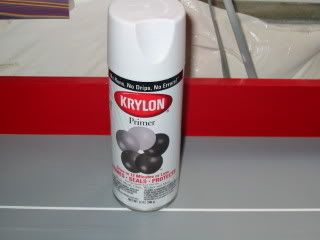 After letting it sit 24 hours, I lightly wet sanded the body with 600 grit sanding paper. I hold it under a faucet when sanding. Remember lightly sand. In the background is Tom's MM/PS Mustang. I haven't forgot about it. I decided to go with a custom paint job on the Stang instead of Robert Patrick's colors. I'll post more pics of it later. 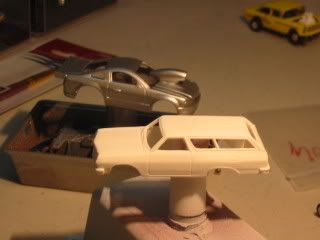 |
|
|
|
Post by kdog on Jun 17, 2008 15:52:16 GMT -7
Very nice Sam, now I think it only fair that RAGU comes out of the closet as well.....  Now repeat after me I LOVE FORD I LOVE FORD I LOVE FORD I LOVE FORD Now dosn't that feel better  |
|
|
|
Post by nightrider on Jun 17, 2008 16:37:54 GMT -7
Ragu..... are you on crack?? FORD!!! Formerly Old and Rusty Dodge unless you drop a Big Block Chevy in it,,, just leave it on the trailer...
|
|
|
|
Post by SKR on Jun 17, 2008 16:44:36 GMT -7
|
|
|
|
Post by SKR on Jun 17, 2008 17:17:01 GMT -7
Time to tape! You all know I like the Tamiya tape. If you buy some, get the dispenser also. It'll keep dust and pet hair from sticking to the side edges of the tape when not in use. 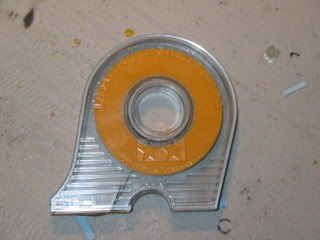 First thing first, you need to decide how your going to paint your car. This one will be similar to the Nova that is in the fresh paint thread but with different colors. The first thing I do is tape the side of the body. Find yourself some reference points on the body to follow. In this case I used the rear body line and watched my spacing under the window trim when laying it towards the front. 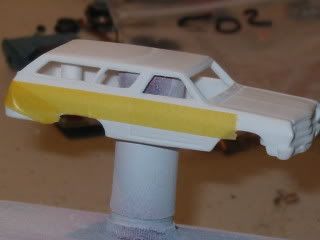 After the sides were laid out I taped the rear. It's much easier to do the back separate instead of running one piece around the whole body. You spend less time doing it this way instead of trying to get all sides that are taped straight. 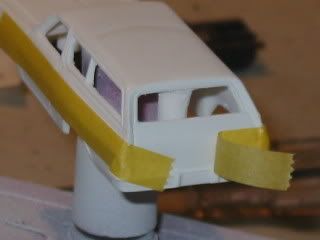 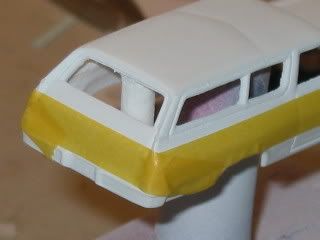 Next I covered the lower half of the body. Over lap your tape just enough to cover. After the lower part was laid out I made some reference points as to where I would round off the edge. Then I took a marker and drew my guide line as to where I would cut. 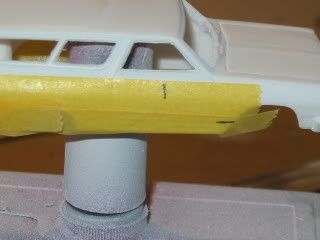 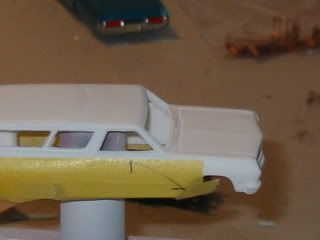 You'll here me say this all the time. Use a new Xacto blade on all new projects. It'll save you a lot of trouble when trying to cut through the tape. A new blade requires very little effort through this tape and will give you a nice crisp line. 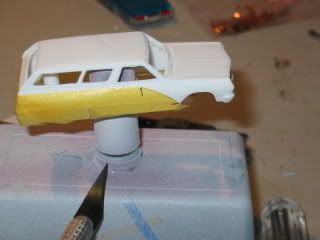 Now is a good time to tuck that excess tape around into the inner fender well. 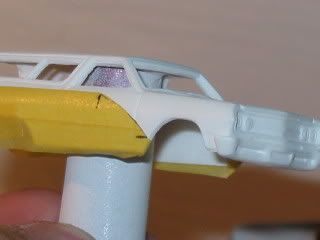 Take some tape and tape off the inside of the body rear wheel openings. I do this to prevent over spray around the wheel wells. 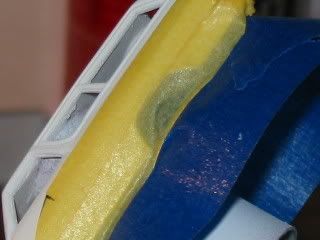 Off to base coat. I used silver dupli color from a spray can. Spray very light coats with about 10 minutes in between coats until covered. 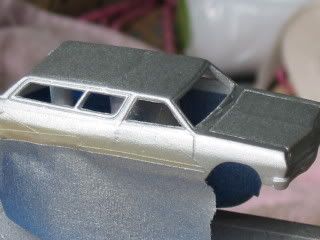 I'm using some metallic burgundy over the top. Again light coats. The paint I'm using is laquer. With this pactra paint I like to thin it to a 1/1 ratio. Always paint in a well ventilated area and wear a respirator. 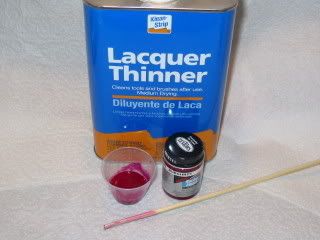 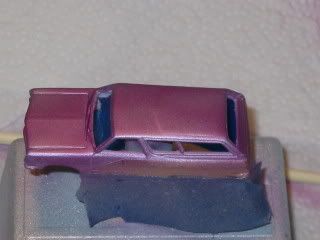 Let it dry for a bit and peel off the tape. 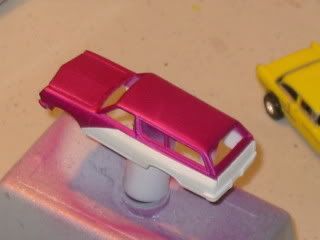 |
|
|
|
Post by da big ragu on Jun 17, 2008 18:23:27 GMT -7
 sam your work with an xcto blade is great i have done some ok one color paint jobs so far just don't have a usb cable to post the pic's yet very sad i know i will try to do some simple stuff soon i like the 65 wagon nice color pic can't wait to see when done !!!!! ok kdog i will try i love fuuuuuuurd i love fuuuuuuurd i love fuuuuuuurd well i can't get it out sorry ;D sam did make me feel good when he sad that anyway chris thanks for the kind words. it feels good to know you guys don't mind all the trash the one and only big ragu oh i realy do like fords there i said it ok 
|
|
Deleted
Deleted Member
Posts: 0
|
Post by Deleted on Jun 17, 2008 18:26:24 GMT -7
What kind of airbrush do you use and how do you clean it up afterwards??
|
|